
In an ideal world, you would never have to worry about switching from your existing web hosting provider. Unfortunately, the world is not ideal and you could be looking for a change for a number of reasons; your web hosting requirements may have changed since you originally started your website or the service provided by your existing web host has deteriorated to an extent that a change is necessary.
If your existing web hosting provider uses the DirectAdmin control panel it’s incredibly easy to backup, transfer and restore your own web hosting account using the built-in backup and restore function.
Note
We would always recommend that you use this function to keep a regular backup of your website – irrespective of whether you are looking to move away – and store it in a safe location such as your personal computer or a cloud backup service like iCloud or Google Drive for safe keeping. In the event of a disaster, such as data corruption, you can use this tutorial to fully restore your DirectAdmin account.
In this guide, we will show you how to backup your website data, existing email accounts, data and settings, along with with your existing MySQL databases using DirectAdmin backup feature. The backup will contain a complete snapshot of your DirectAdmin account at the time of backup. We will then transfer the account backup to your new web hosting provider and restore the account backup to your new web hosting provider in the event of a provider change or if using to recover your account files from disaster.
For ease, this tutorial is split into two different sections, How to Backup an Existing DirectAdmin Account and How to Restore an Existing DirectAdmin Account. You can quickly jump to each section by using the links above.
How to Backup An Existing DirectAdmin Account
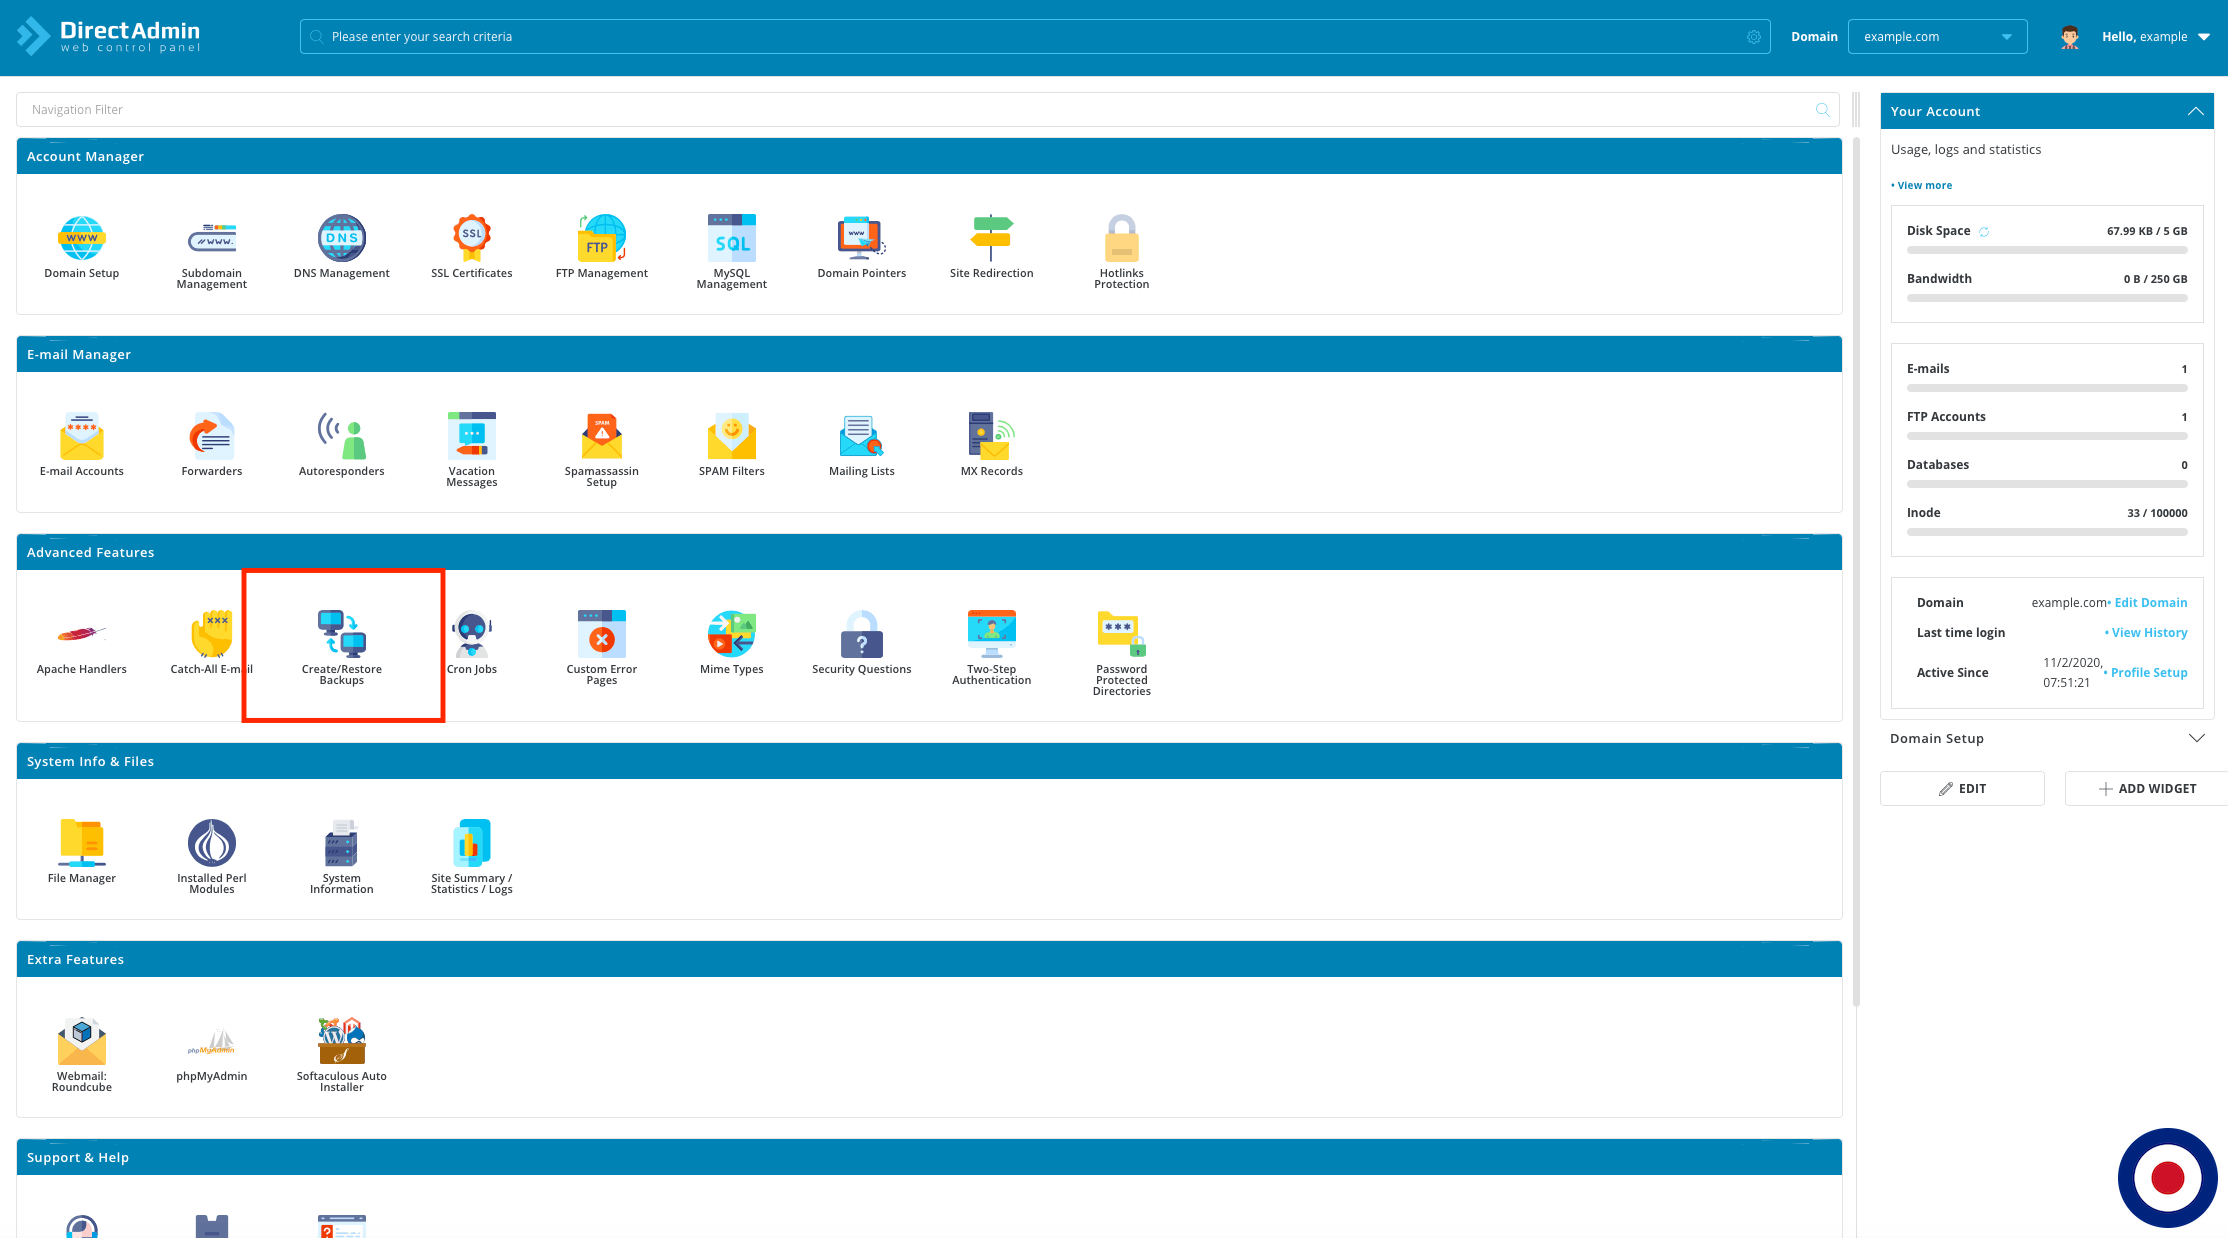
Firstly, you’ll need to login into your existing web hosting DirectAdmin account. You will generally find you can access the control panel, using either https://www.domain.com:2222 or https://servername.domain.com:2222. Once you have logged into your DirectAdmin account, you’ll need to click on the Create/Restore Backups icon.
Note
In our tutorial we are using the DirectAdmin Evolution theme with modern icons. The theme used by your existing web hosting provider might be different. If it is, don’t panic, all the option names are still the same.
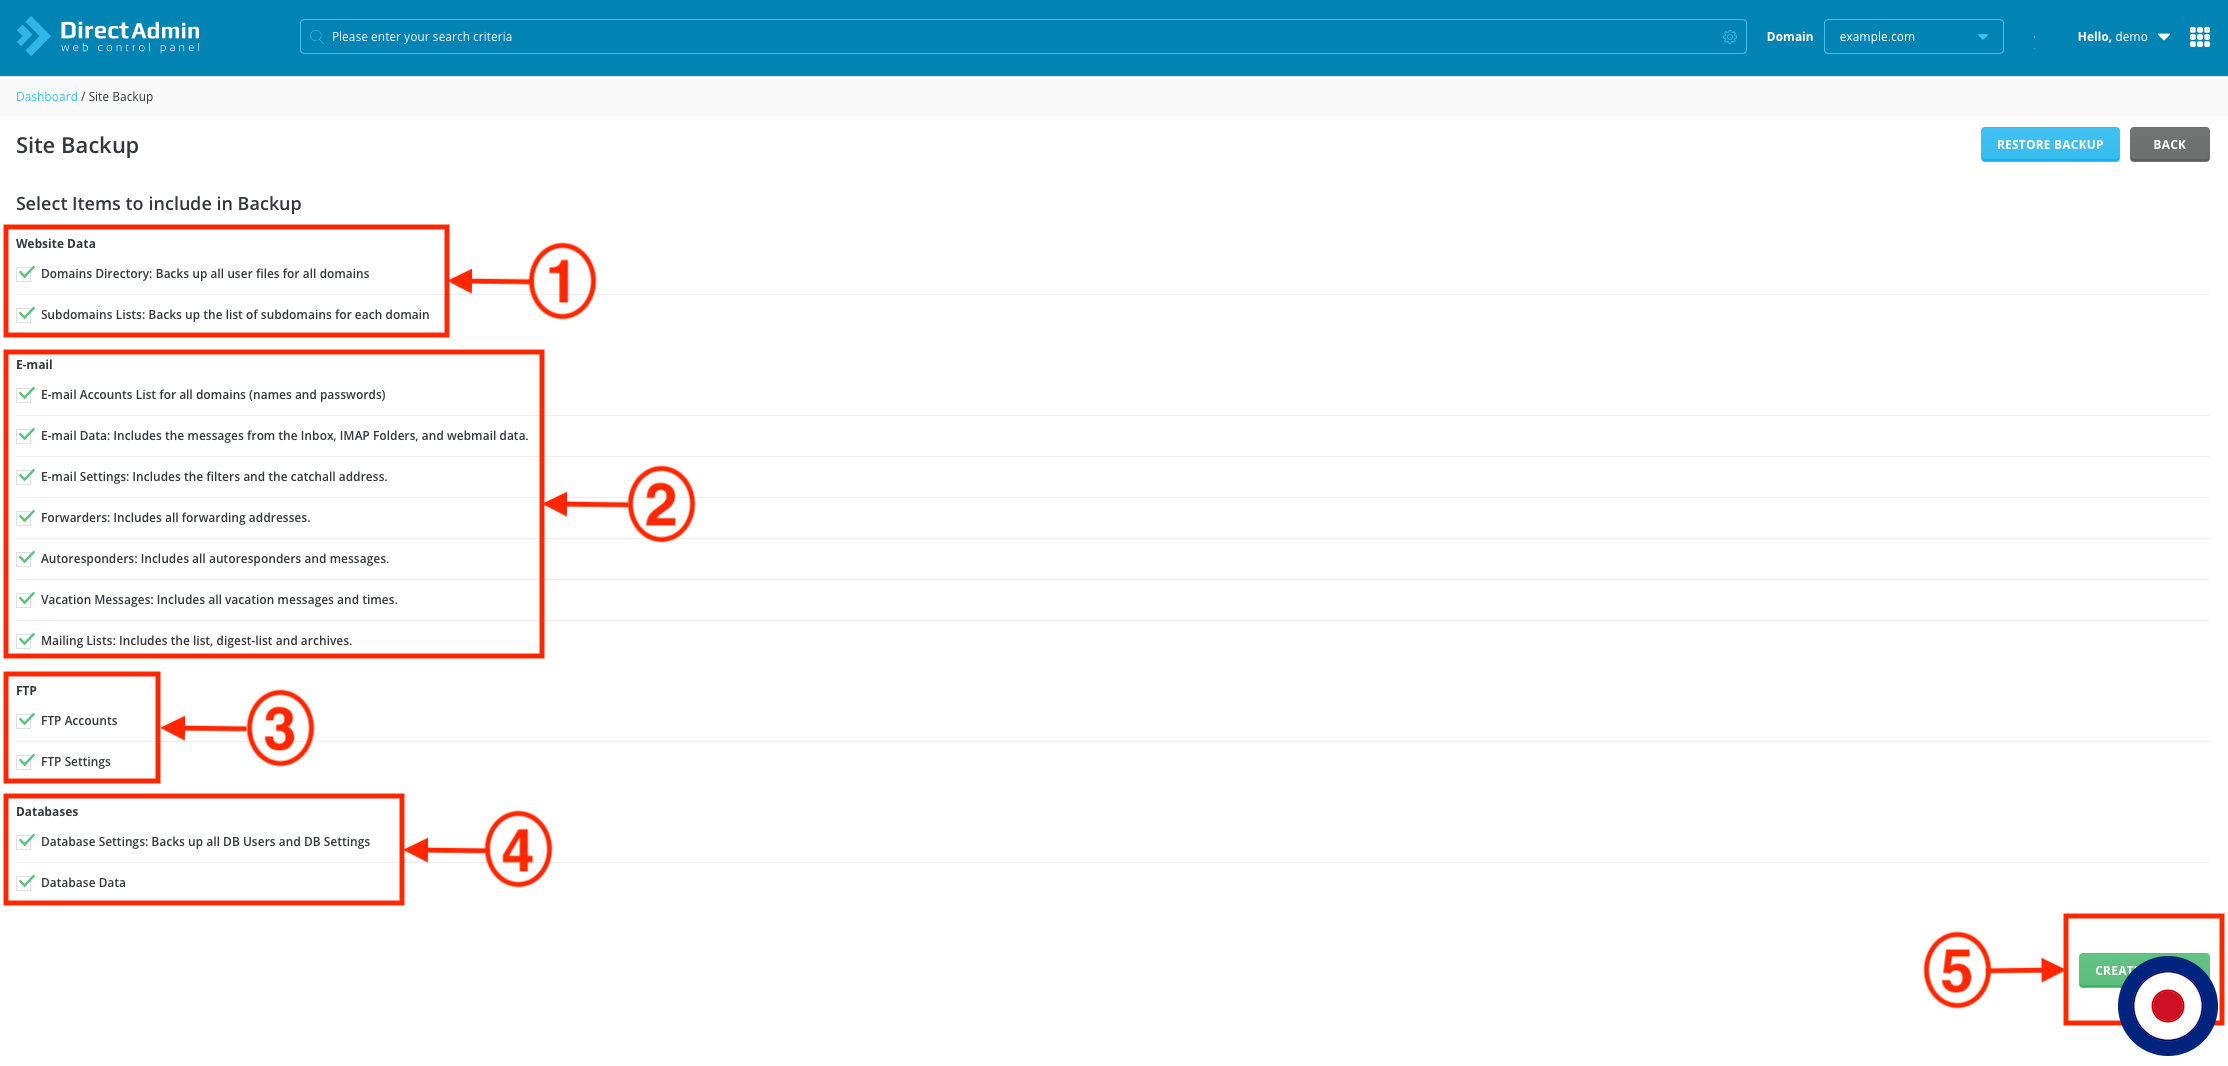
This will open the Site Backup dashboard. Here you will find all the different options available to customise what DirectAdmin will backup, for example, if you only wanted to backup your website data you would untick all the email, FTP and Databases options. For this tutorial we will be making a complete DirectAdmin account backup so we have kept all options selected.
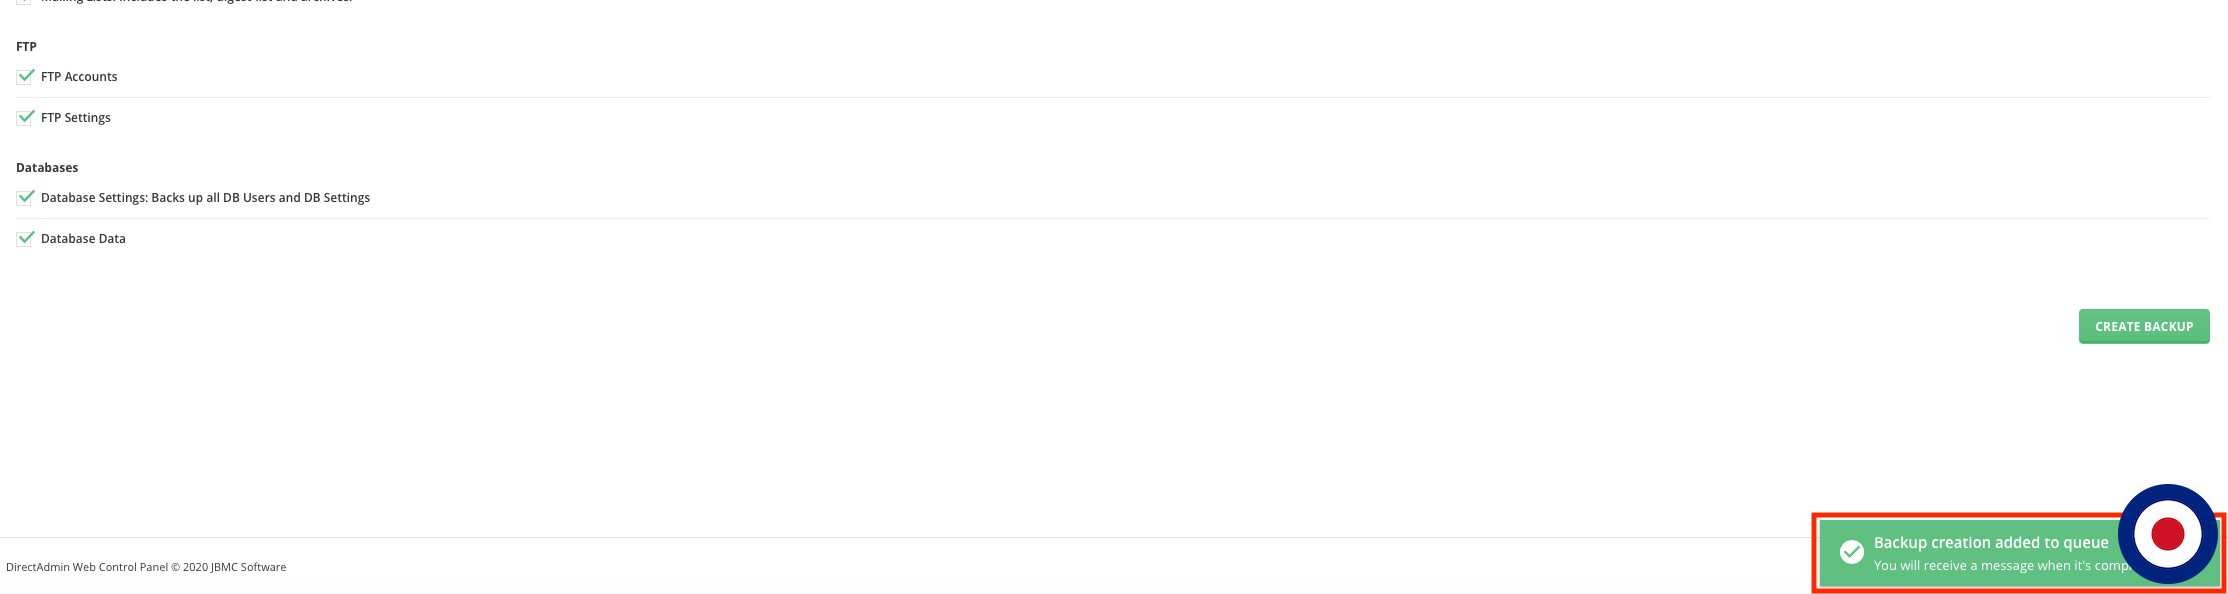
Once you have selected your Site Backup options, click the Create Backup button.
Now you will see a confirmation box appear in the lower right of the screen, which says the backup creation has been added to the queue, you will receive a message when it’s complete.
Once the backup has been created, you’ll receive an email to your account email address and an alert in the dashboard above the avatar image to inform you that the backup process has completed.
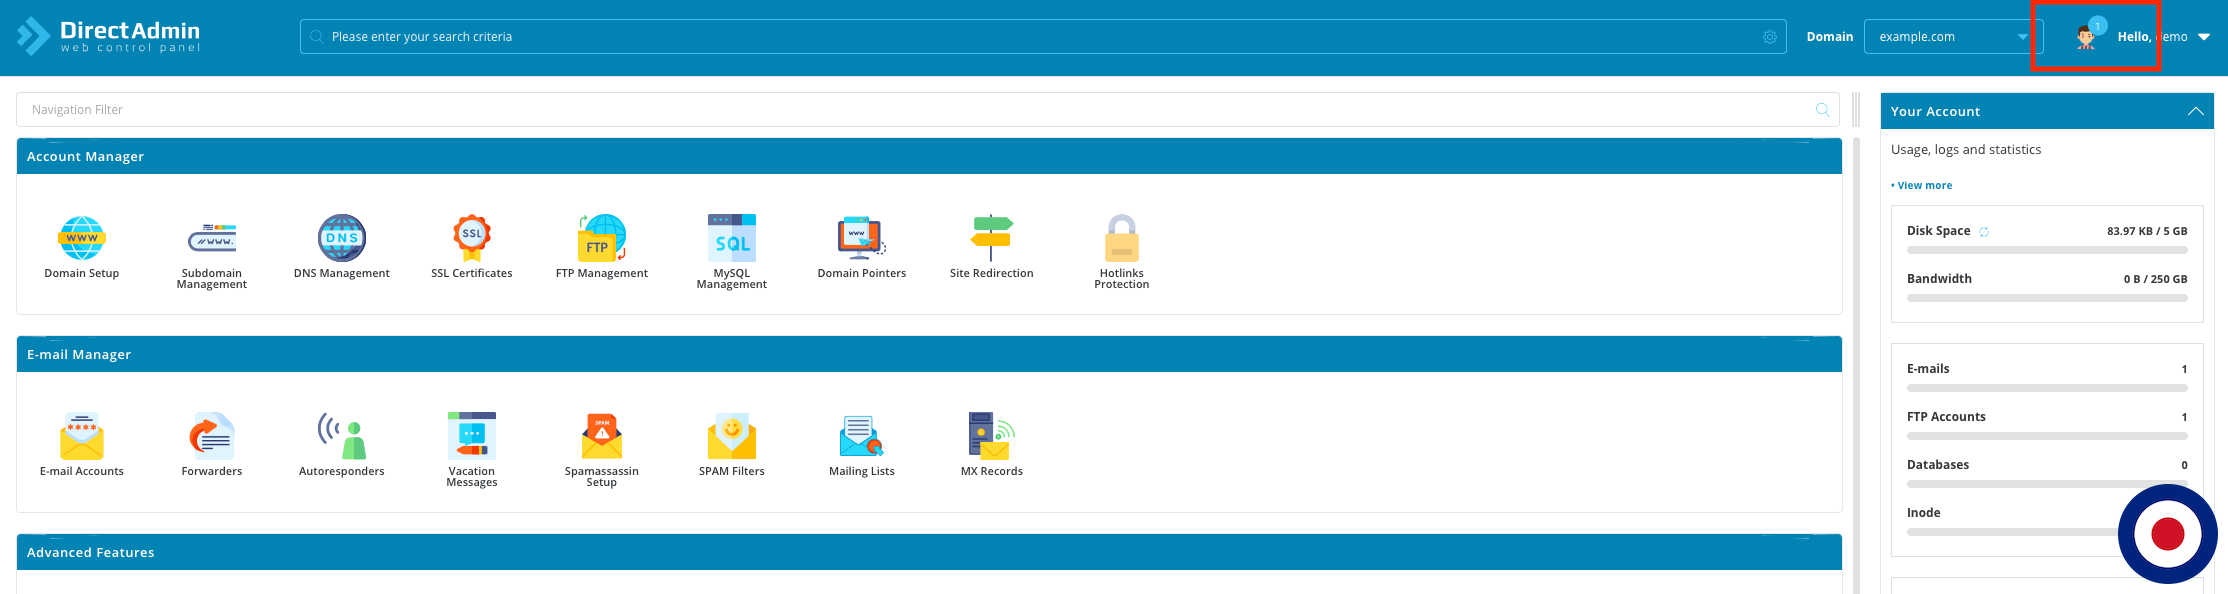
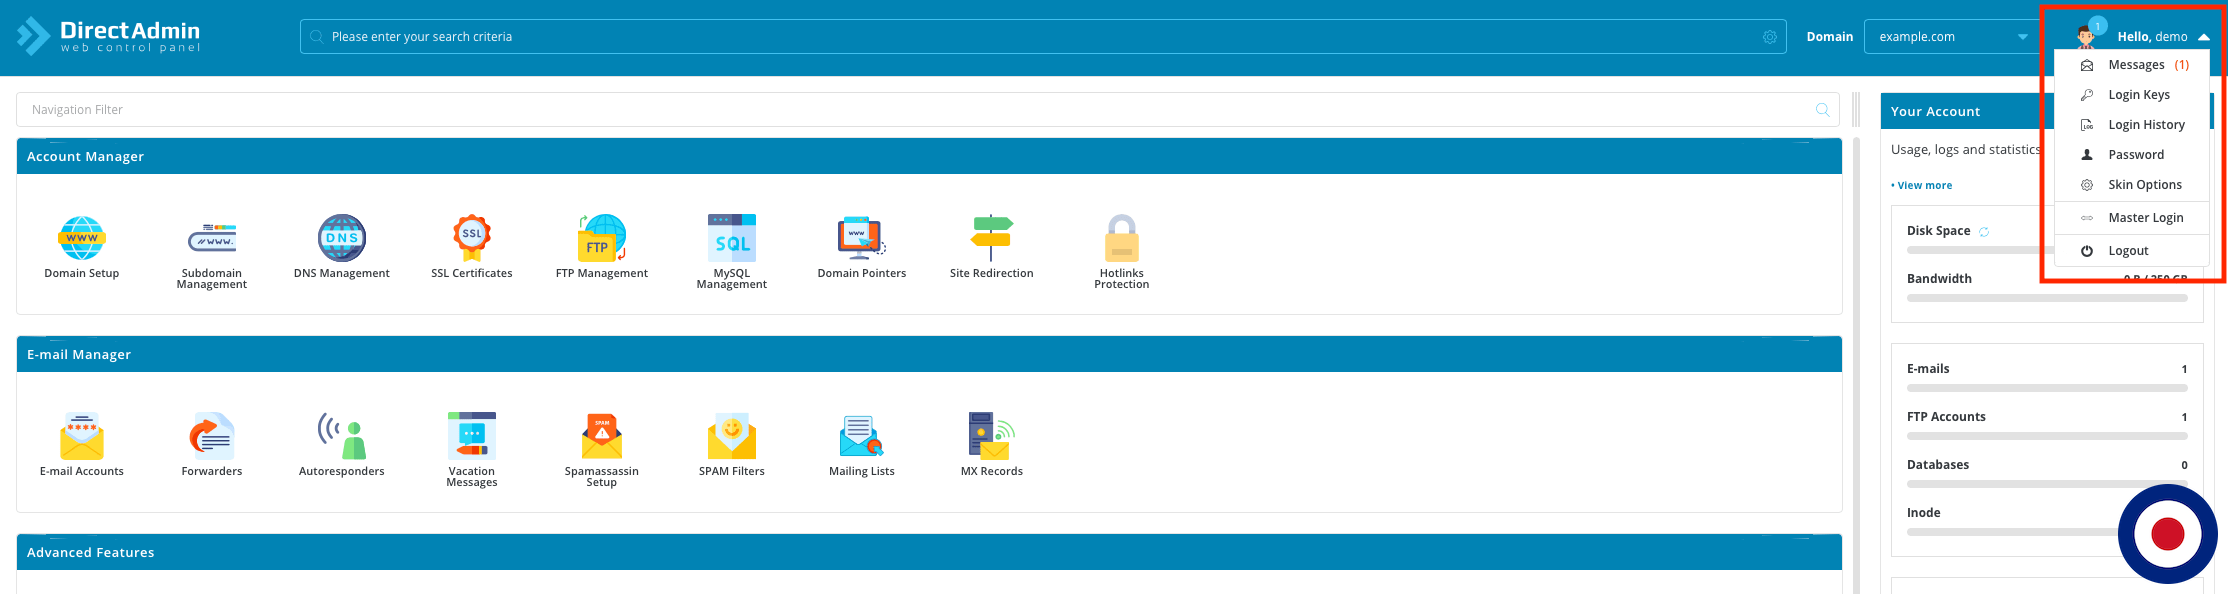
If you click on the avatar image next to your account name, a dropdown menu will appear. Select the first option Messages and you will be taken to the My Messages dashboard.
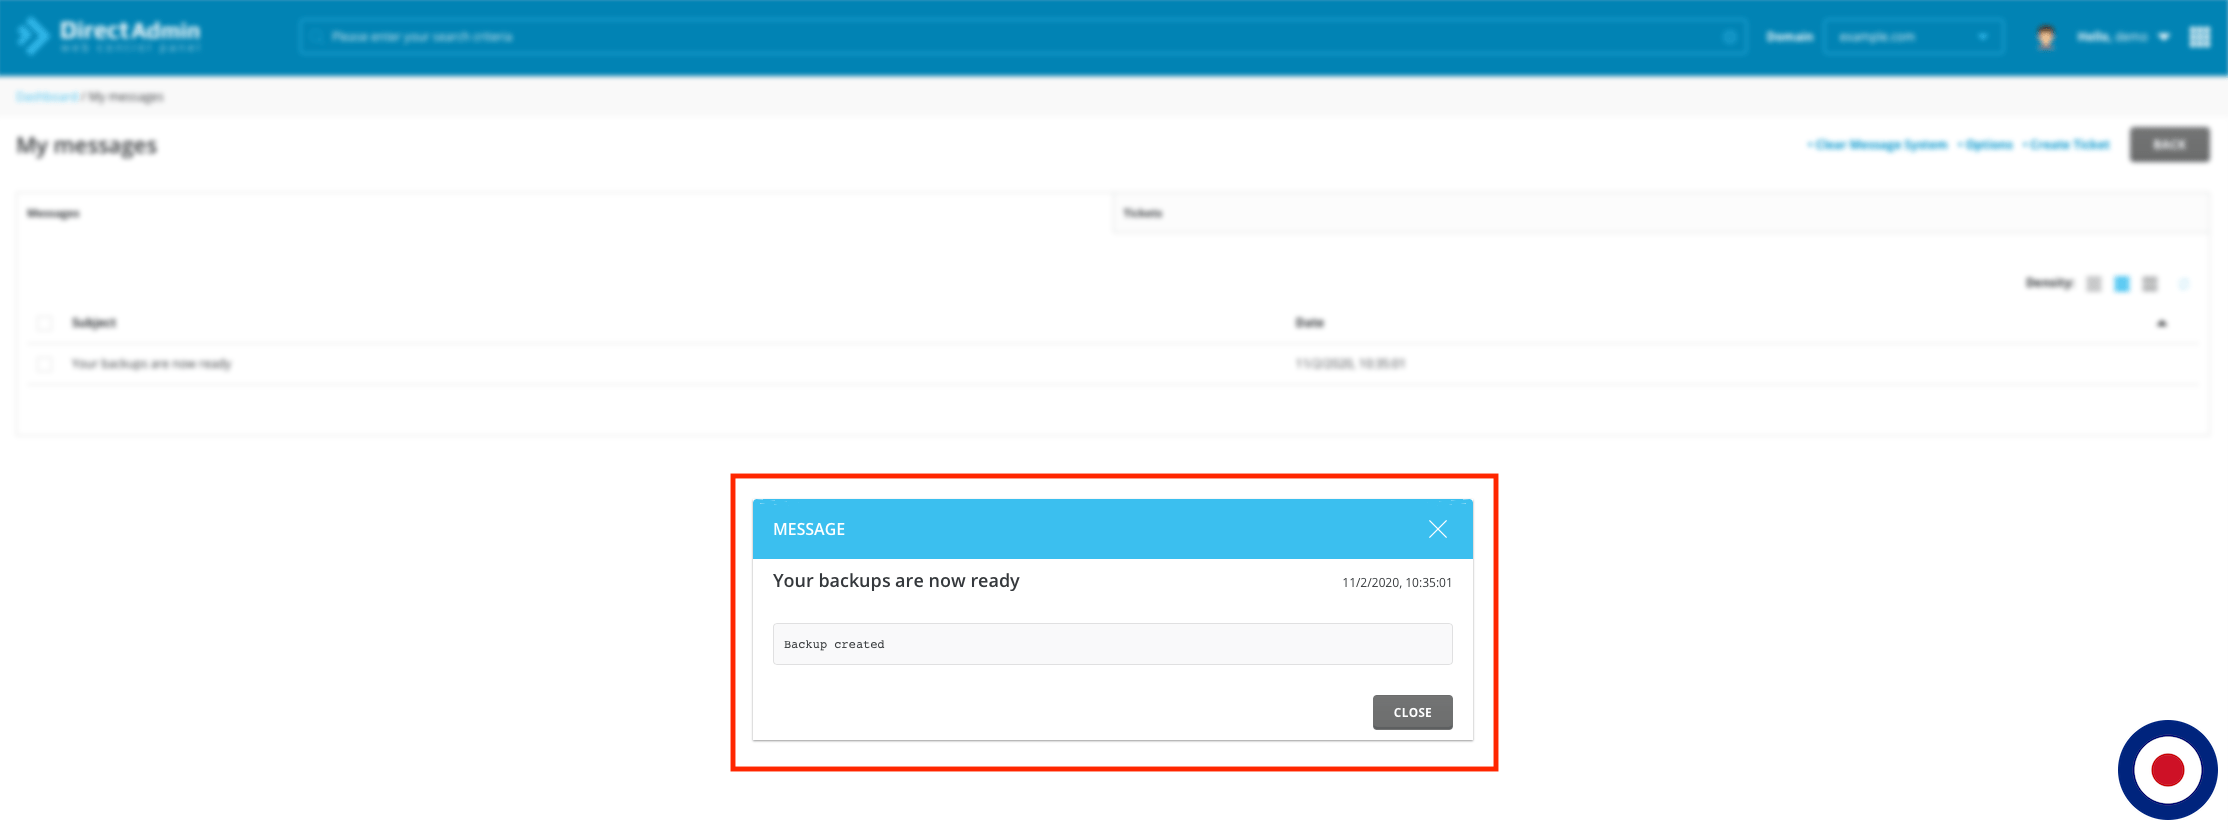
In the My Messages dashboard, you’ll now have an unread message stating your backups are now ready.

If you click on the message, it will open the message body and highlight if any errors have occurred during the backup process. If there are no error the message will simply say backup created. Once you have read the message you can click Close and delete as required.
That’s your full DirectAdmin account backup now completed. How simple was that? Now, we will move onto the File Manager and show you where DirectAdmin stores all your account backup files, so you can download the backup file to move to your new web hosting provider, store offline or transfer the file to an alternative Cloud based provider such as iCloud or Google Drive.
Important
By default, DirectAdmin will store all your account backups inside your web hosting account. These backup files will count towards your disk space limits with your web hosting provider. Also, it would be good practise to ask your web hosting provider if they allow you to store DirectAdmin account backup files in your web hosting account. Some web hosting providers will allow it, some will limit the amount of backups you can store and some will explicitly prohibit you from storing them at all.
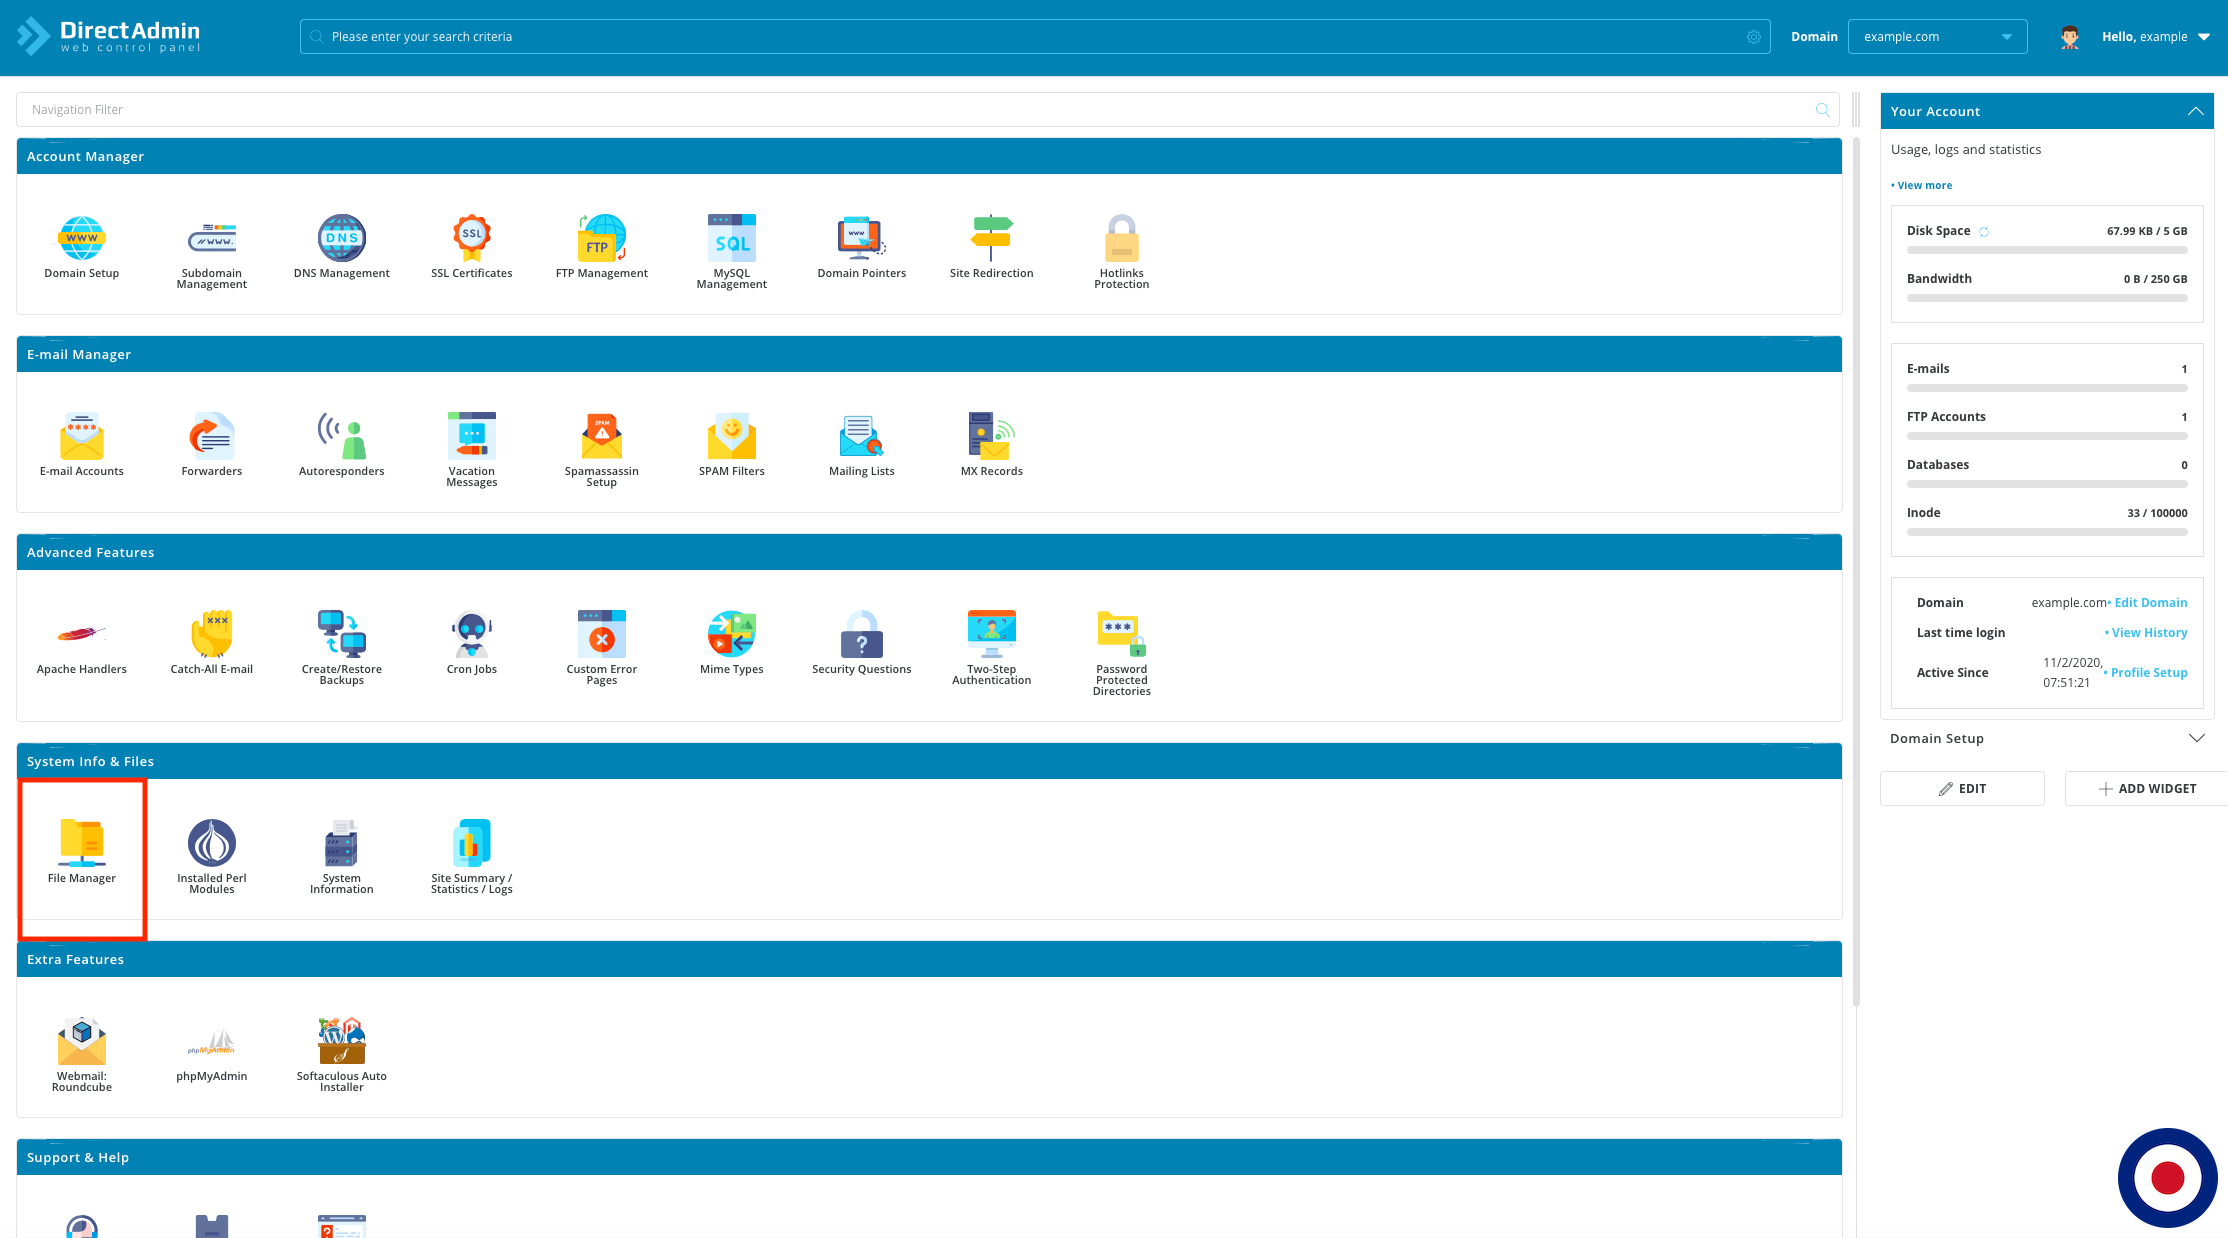
Now we will need to download the new account backup file. In the DirectAdmin dashboard you’ll need to select the File Manager icon.
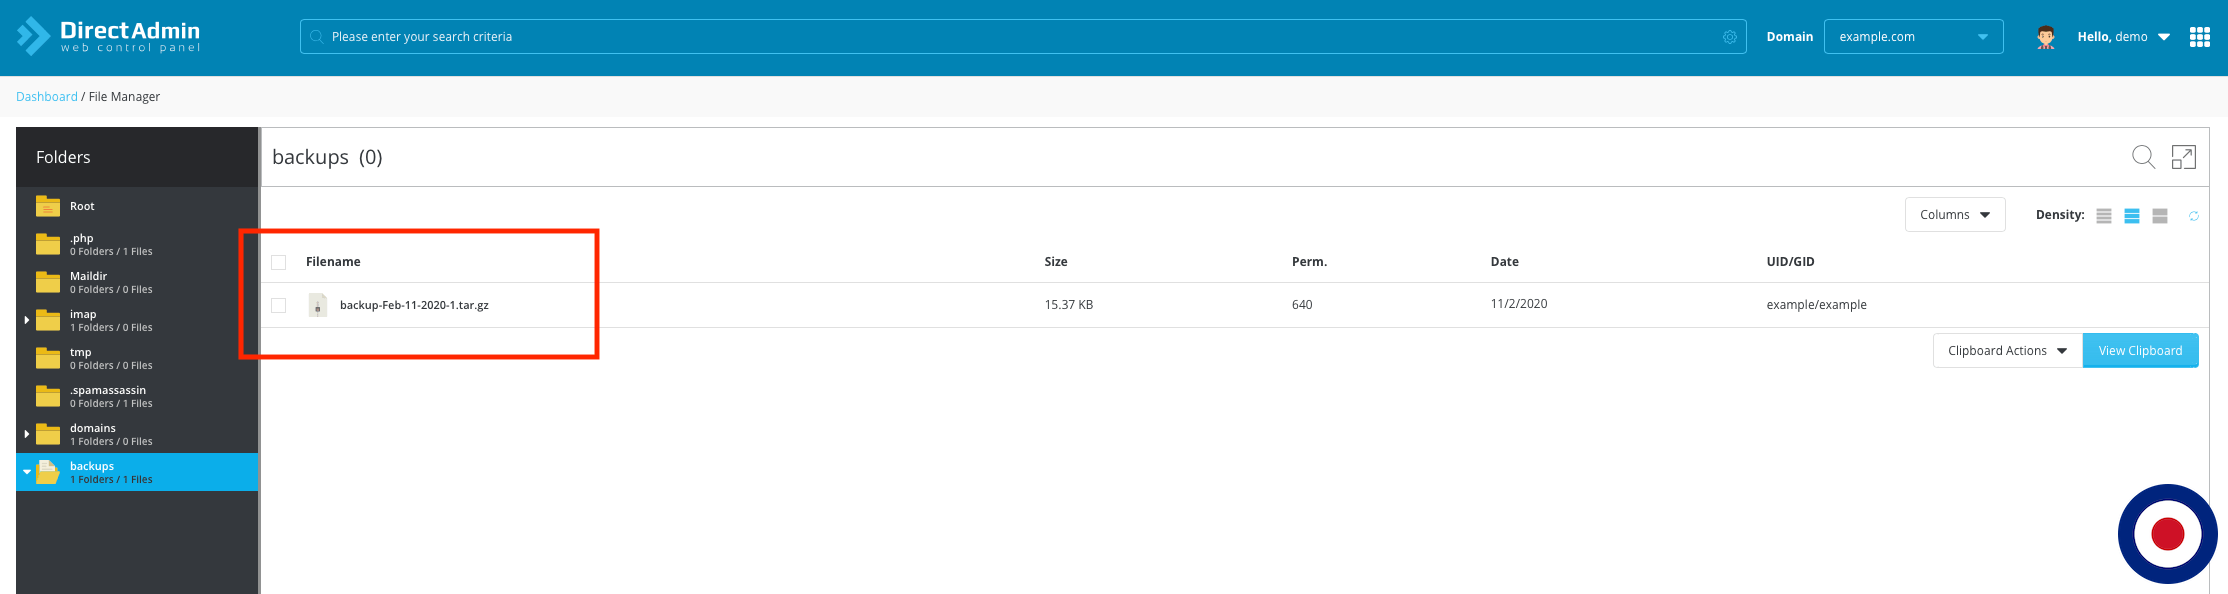
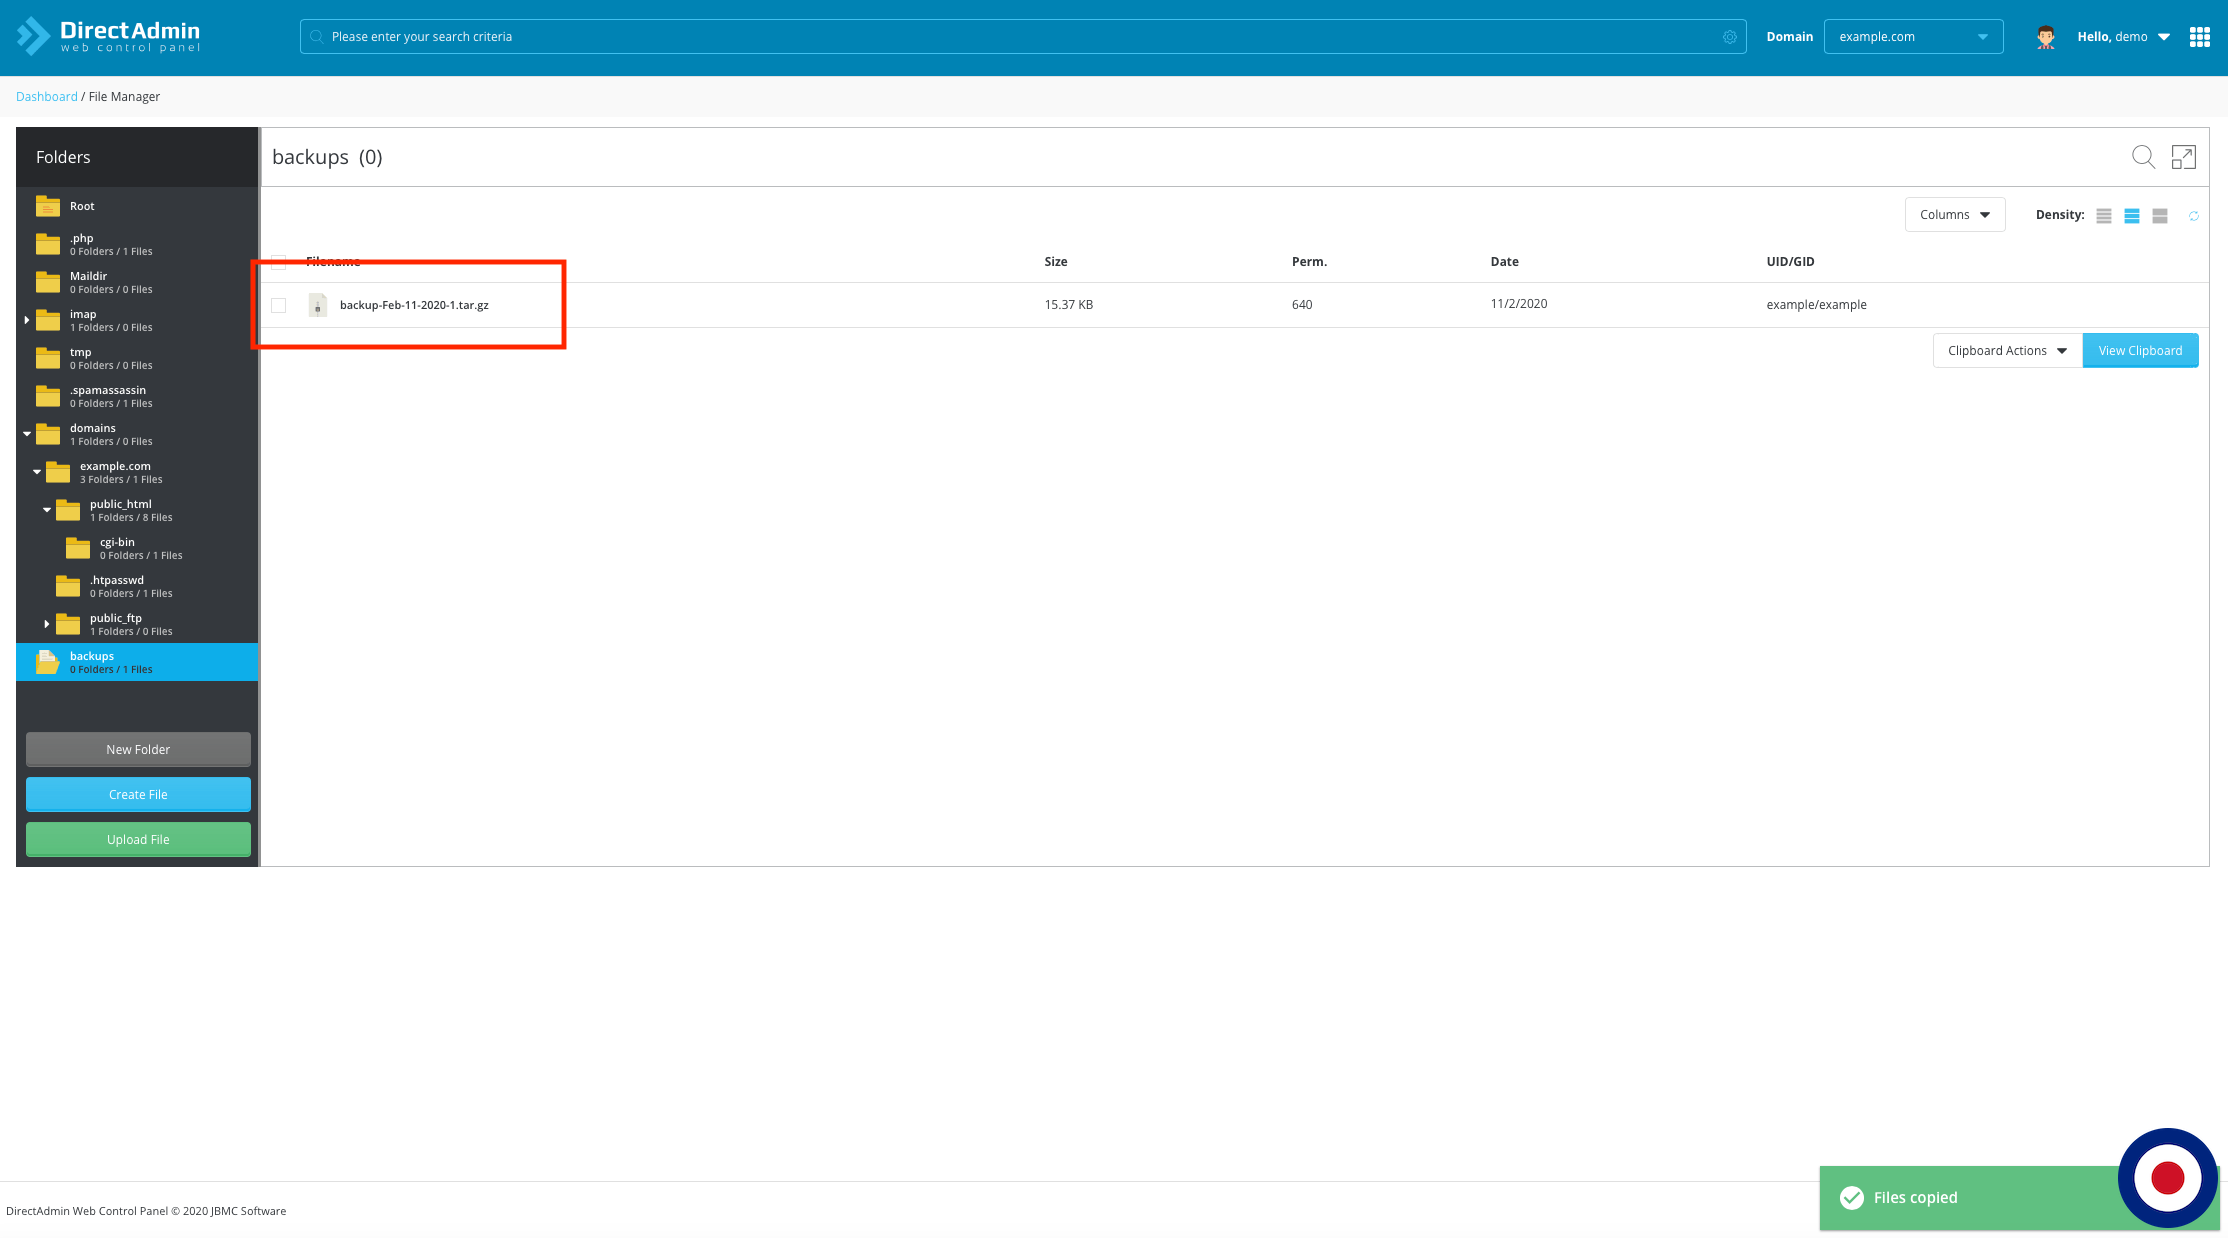
You will now be see a list of files and folders inside your Root folder. DirectAdmin stores all account backup files inside it own folder called Backups. You can access this folder by clicking backups from the main sidebar menu or from the list of files and folders.
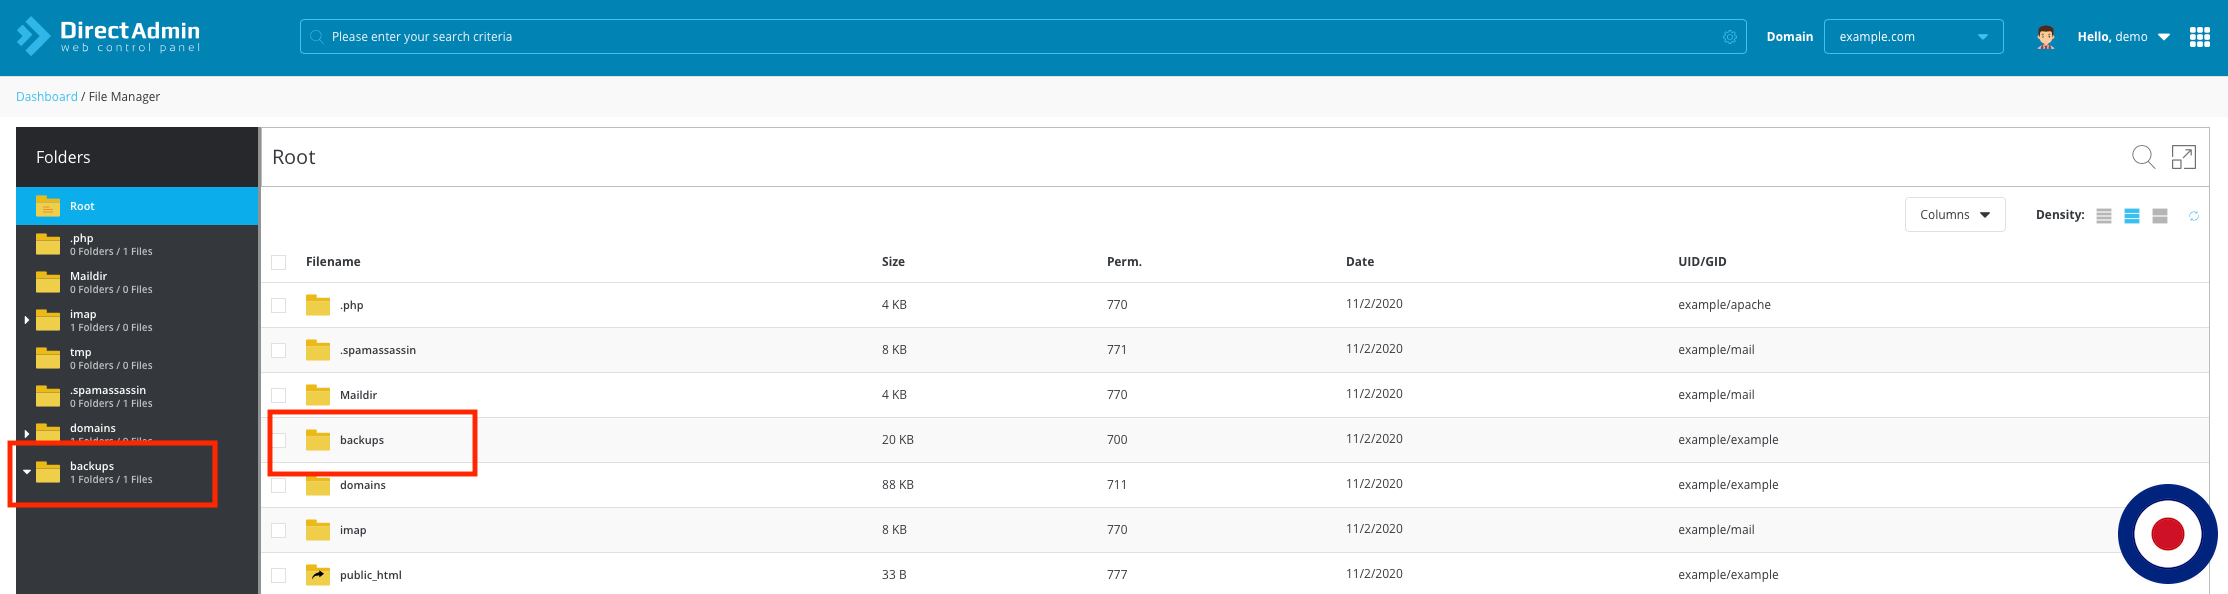
In the backups folder you will now see the DirectAdmin account backup file called backup-DATE.tar.gz that you created earlier. The file extension .tar.gz at the end of the backup file simply means it has been compressed in size.
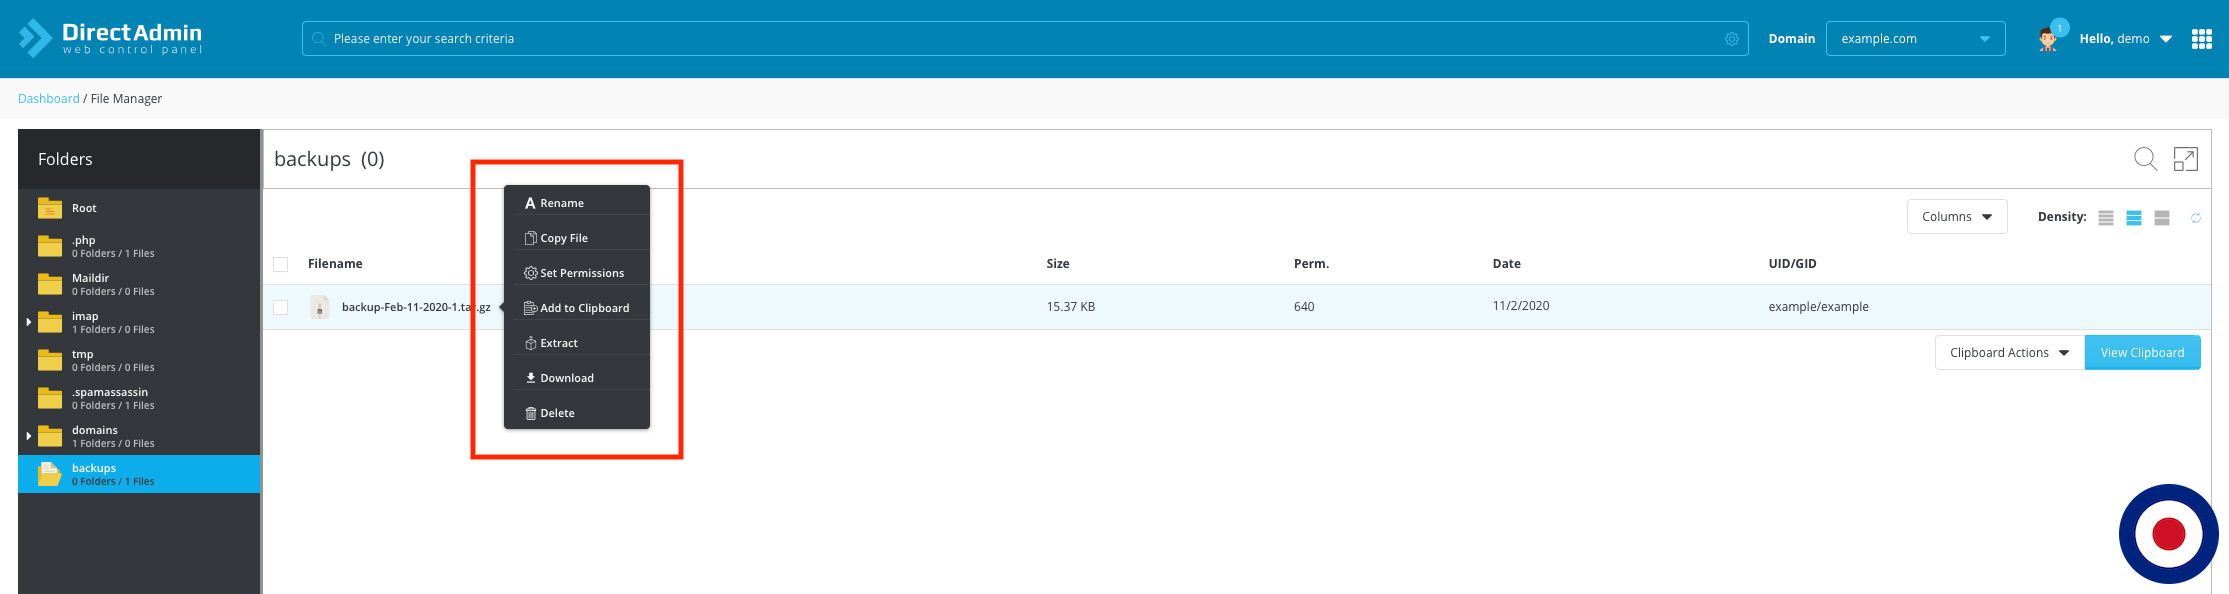
Now if you highlight the backup file a sub-menu will open. In the sub-menu you can rename the file, copy the file, change the file permissions, add file to clipboard (move), extract the contents, download the file or delete it altogether. For this tutorial we will be selecting the Download option. Once you click Download the backup file will automatically download via your browser to the download folder on your computer.
Note
Alternatively, if you would prefer you can use an FTP client rather than the File Manager to download your account backup file. Rather than selecting the File Manager icon, you would simply log into your account using your account’s FTP credentials, navigate to the backups folder and download the backup file to your computer from there.
That’s it. You have now successfully backed up your existing DirectAdmin account website data, existing email accounts, data and settings, along with your MySQL databases and downloaded a copy to your computer.
How to Restore An Existing DirectAdmin Account
Now we need to restore the DirectAdmin account backup with your new web hosting provider. Firstly, you’ll need to login into your DirectAdmin account. You will generally find you can access the control panel, using either https://www.domain.com:2222 or https://servername.domain.com:2222.
Note
This part of the tutorial, focuses on how to upload your DirectAdmin account backup file using the File Manager built into the DirectAdmin control panel. If you are using an FTP client to upload your DirectAdmin account backup file you can skip this part. Make sure you upload the account backup file to the Backups in your root directory.
Once you have successfully logged into your DirectAdmin account, you will need to click on the File Manager icon.
Note
In our tutorial we are using the DirectAdmin Evolution theme with modern icons. The theme used by your existing web hosting provider might be different. If it is, don’t panic, all the option names are still the same.
You will now be see a list of files and folders inside your Root folder. DirectAdmin stores all account backup files inside it own folder called Backups. You can access this folder by clicking backups from the main sidebar menu or from the list of files and folders.
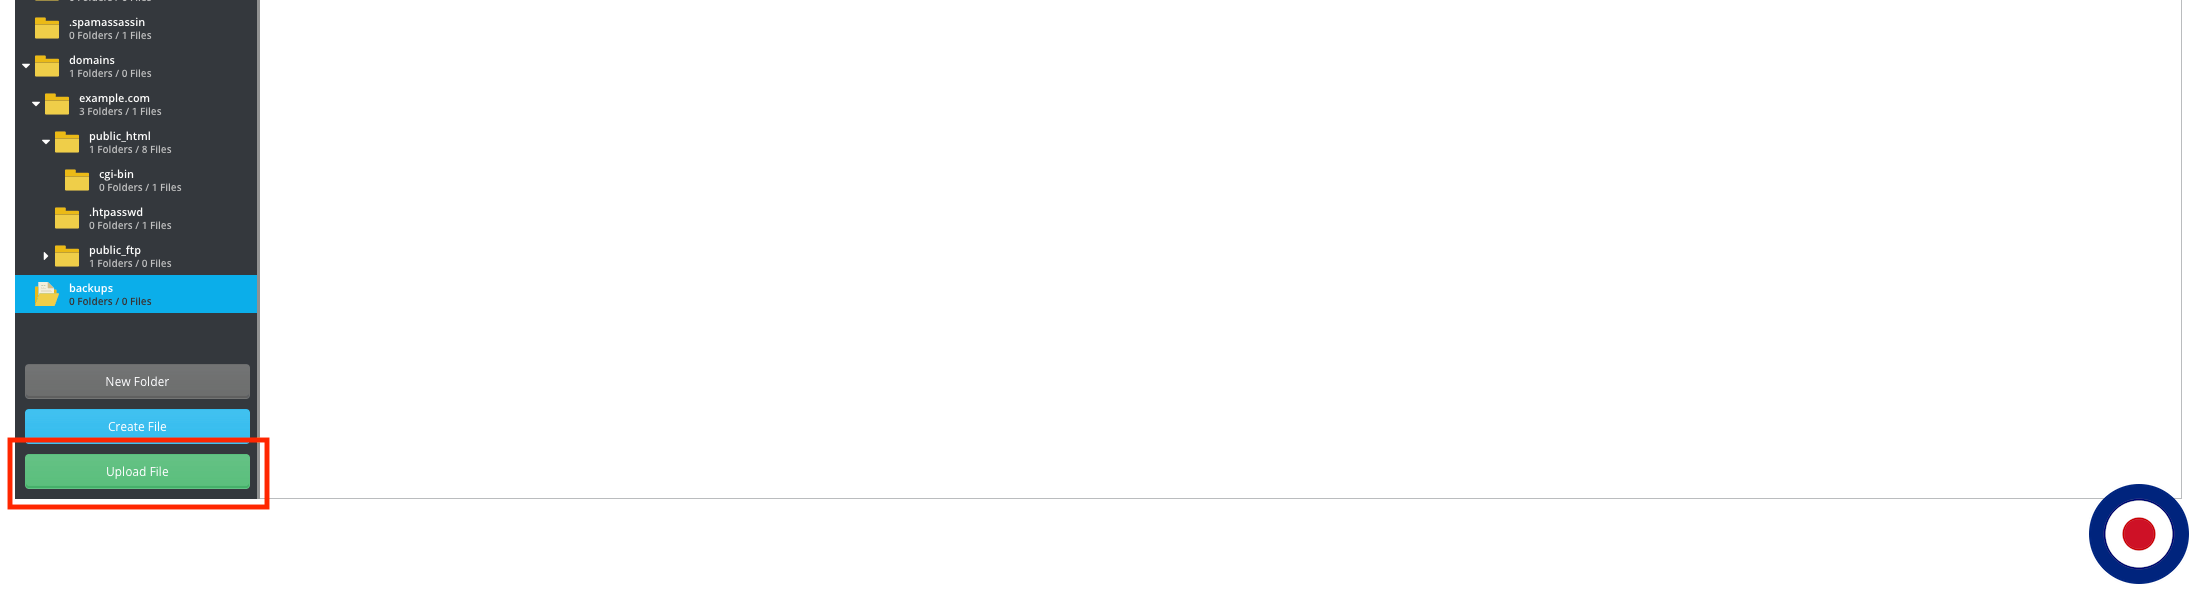
Now we will need to upload the DirectAdmin account backup file to the Backups folder. To upload the file simply click the Upload File button from the main sidebar menu. This will open the Upload File modal.
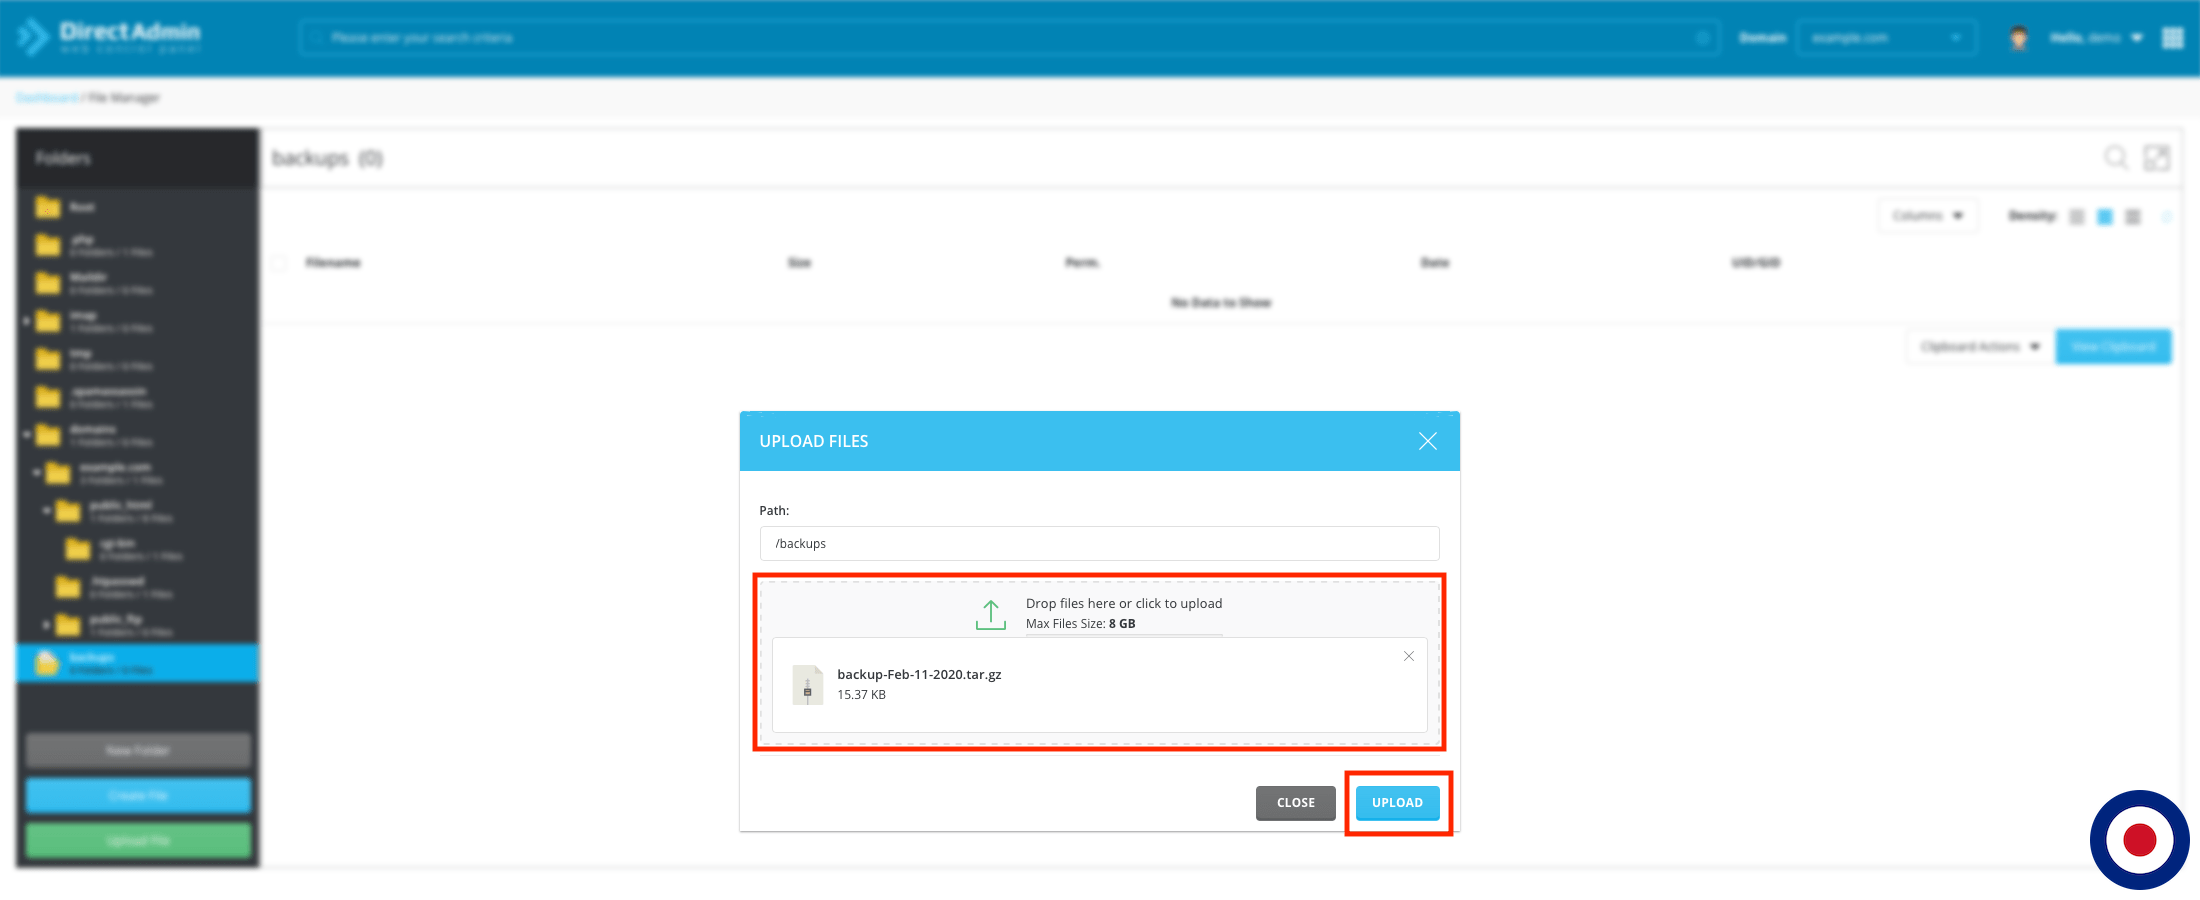
In the Upload File modal, you will need to drag the DirectAdmin account backup file from your computer into the browser screen or alternatively you can click the upload section to manually locate your DirectAdmin account backup file on your computer.

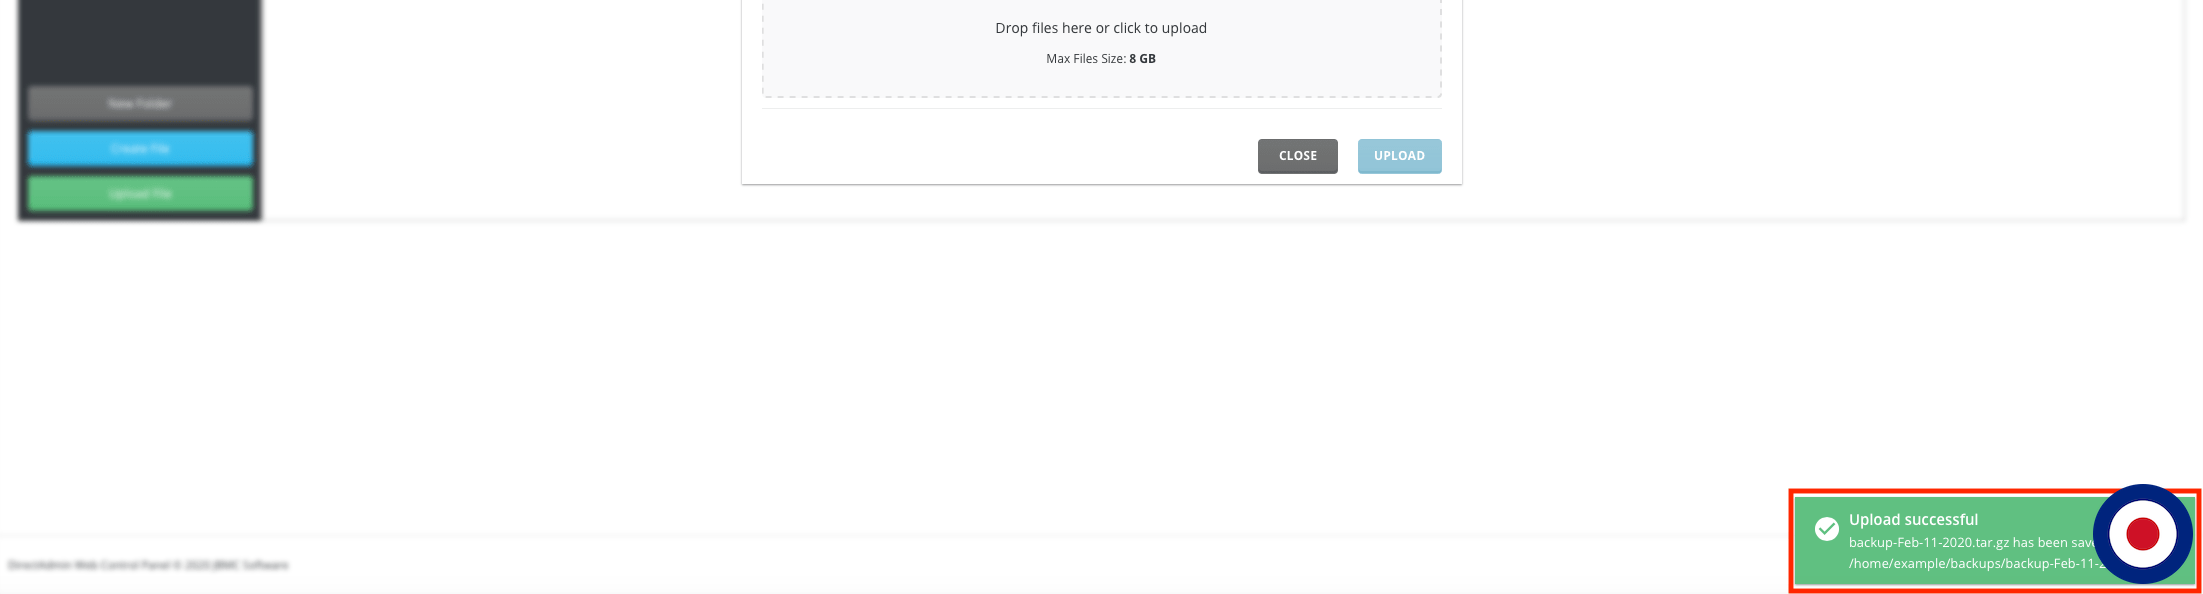
Once you have added the DirectAdmin backup file, it will show the file name, for example, backup-Feb-11-2020.tar.gz in the Upload File modal. To complete the upload and transfer the file to your DirectAdmin account, you will need to click the Upload button.
Warning
DirectAdmin will by default limit the size of any files uploaded through the DirectAdmin control panel. As you can see in the image above the limit is 8GB. If your DirectAdmin account backup is larger than 8GB, you will either need to contact your new web hosting provider to see if they will raise the limit for you or alternatively you will need to manually upload the file using an FTP client.
Once you have clicked the Upload button, you’ll see a confirmation message in the bottom right corner of the screen showing the backup file name, location and confirmation that the DirectAdmin backup file has been successful uploaded to your account.
That’s it. You have now successfully uploaded your DirectAdmin account backup file using the File Manager to your DirectAdmin control panel.
Now we will show you how to restore your DirectAdmin account backup file to your new DirectAdmin web hosting account using the Create/Restore Backups feature. In the DirectAdmin dashboard you will need to click on the Create/Restore Backups icon which will load the Site Backup dashboard.
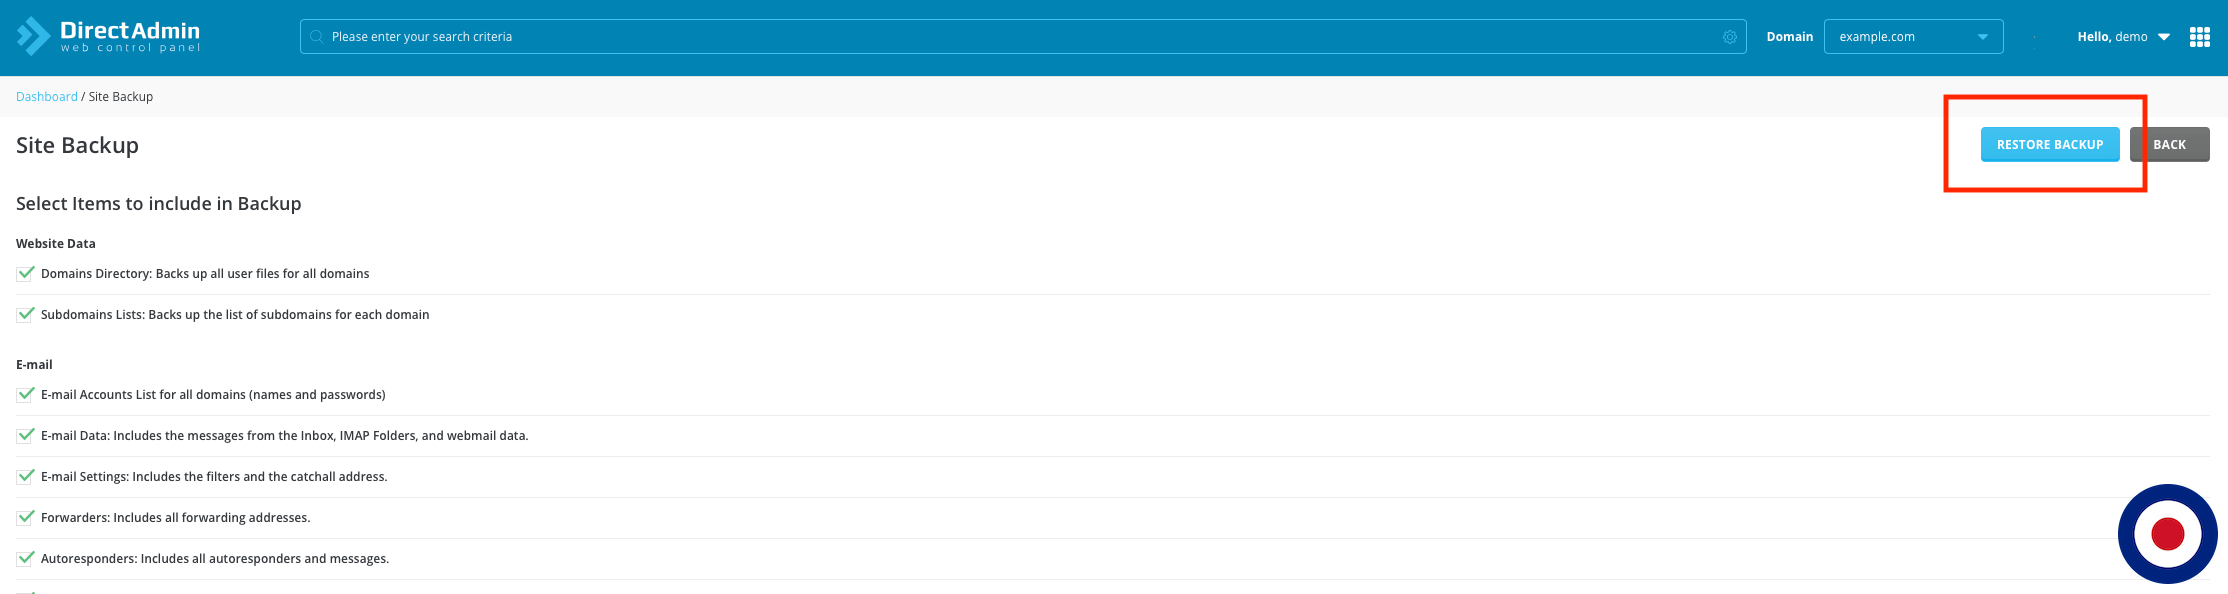
From the Site Backup dashboard you will need to click on the Restore Backup in the top right of the screen. This will load the Restore Backup dashboard.
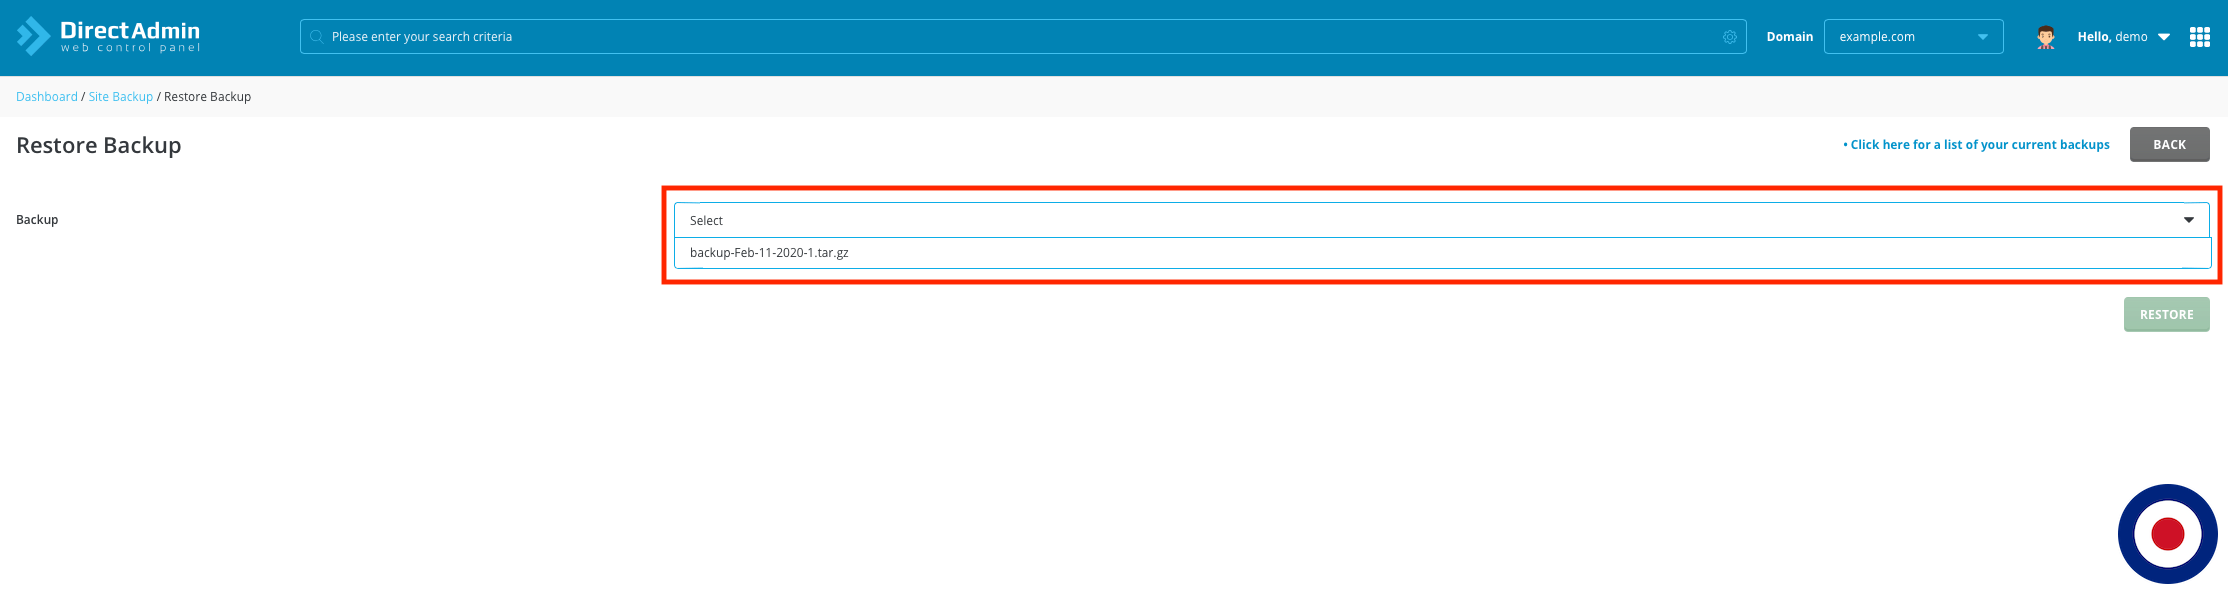
In the Restore Backup dashboard, you will need to select your DirectAdmin account backup file which you uploaded to your account earlier using the File Manager. Select your DirectAdmin account backup file using drop down menu.
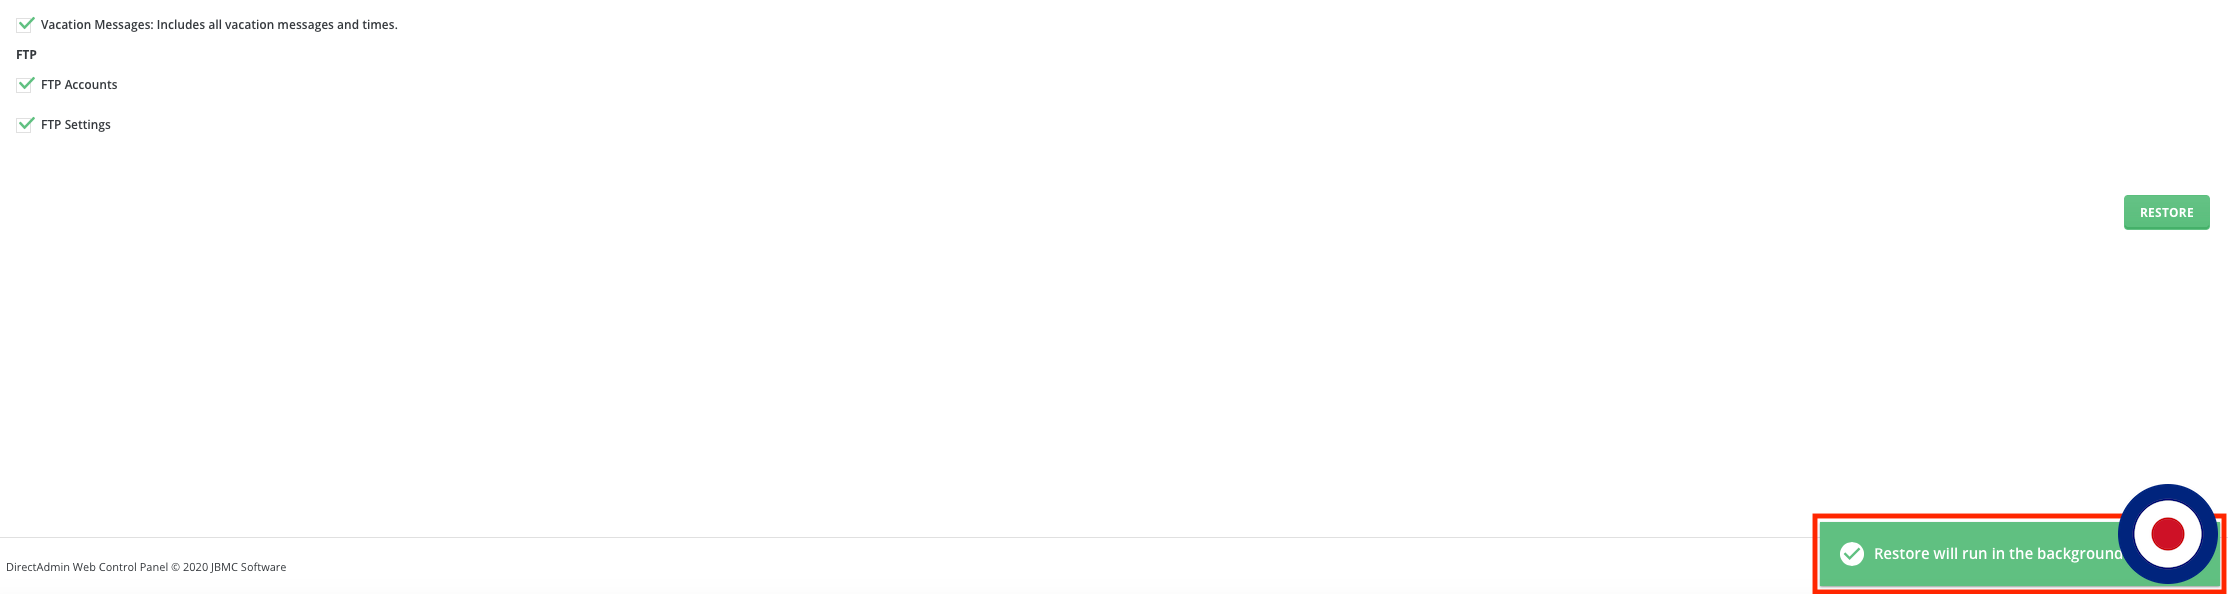
The Restore Backup dashboard will now display the Restore Options. The tick box options allows you to choose what parts of your DirectAdmin account you would like to restore, for example, if you only wanted to restore your email data you would untick all the website data and FTP options and just leave the email data options ticked. For this tutorial we will be restoring a complete DirectAdmin account so all we have selected all options.
Once you have selected your Restore Options, click the Restore button.

After clicking the Restore button, you will see small confirmation box appear in the lower right of the screen, which says that the Restore will run in the background.
Note
This means you do not have to remain in the Restore Backup panel and can move to other areas of the DirectAdmin dashboard without impacting the restore process.
Once the account restoration process has completed, you’ll receive an email to your DirectAdmin account email address and an alert in the dashboard above the avatar image to let you know. Depending upon the size of the account to be restored this could take a little while, so be patient.
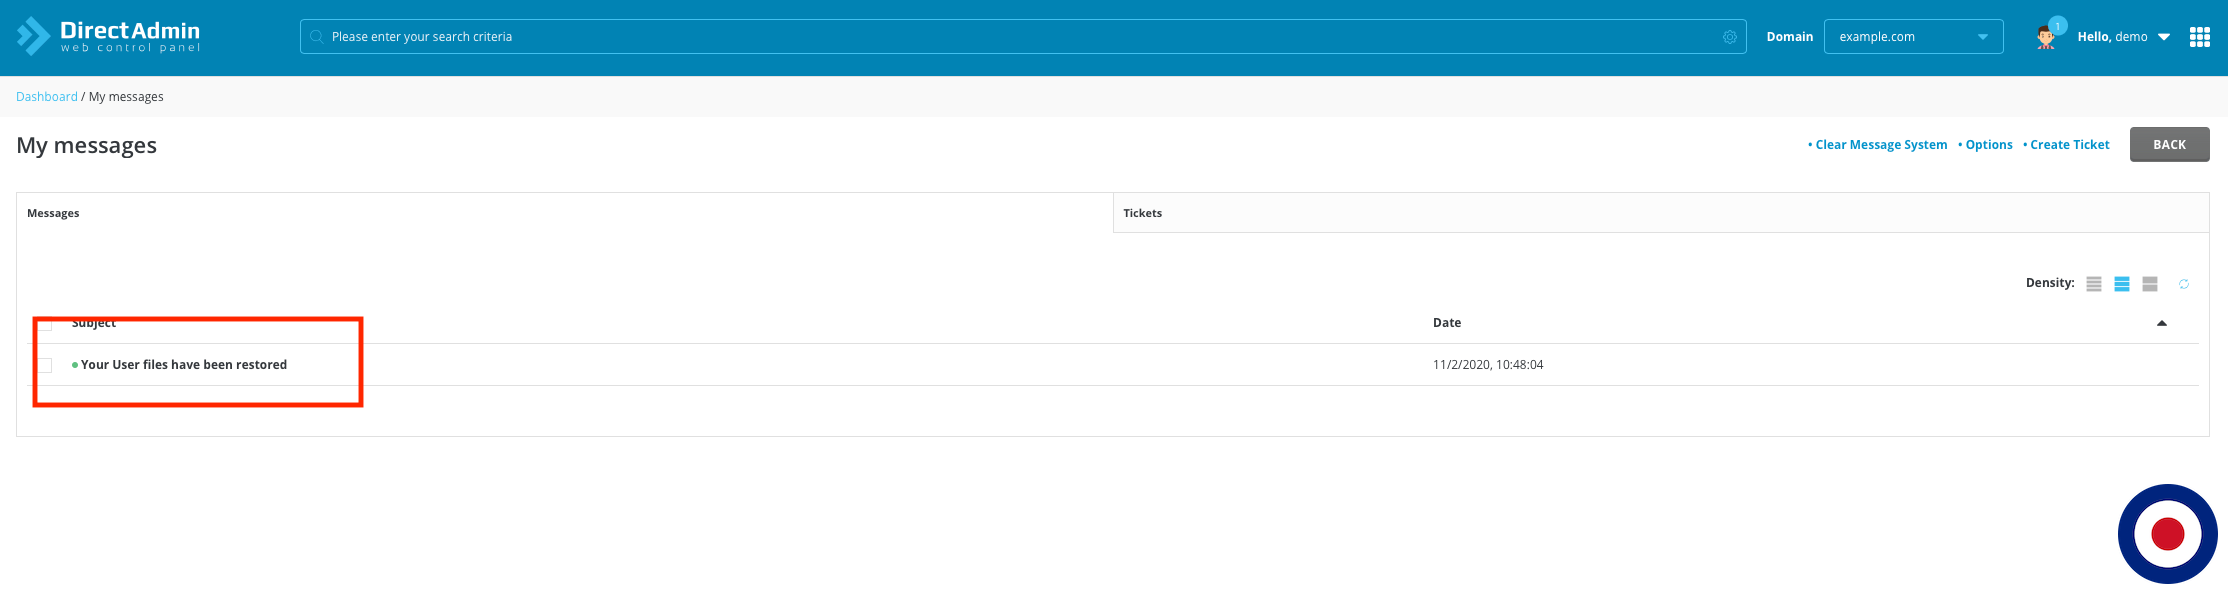
To view the alert, simply click on the avatar image next to your account name and dropdown menu will appear. Select the first option Messages and you will be taken to the My Messages dashboard.
In the My Messages dashboard, you’ll now have a message which says your User files have been restored.
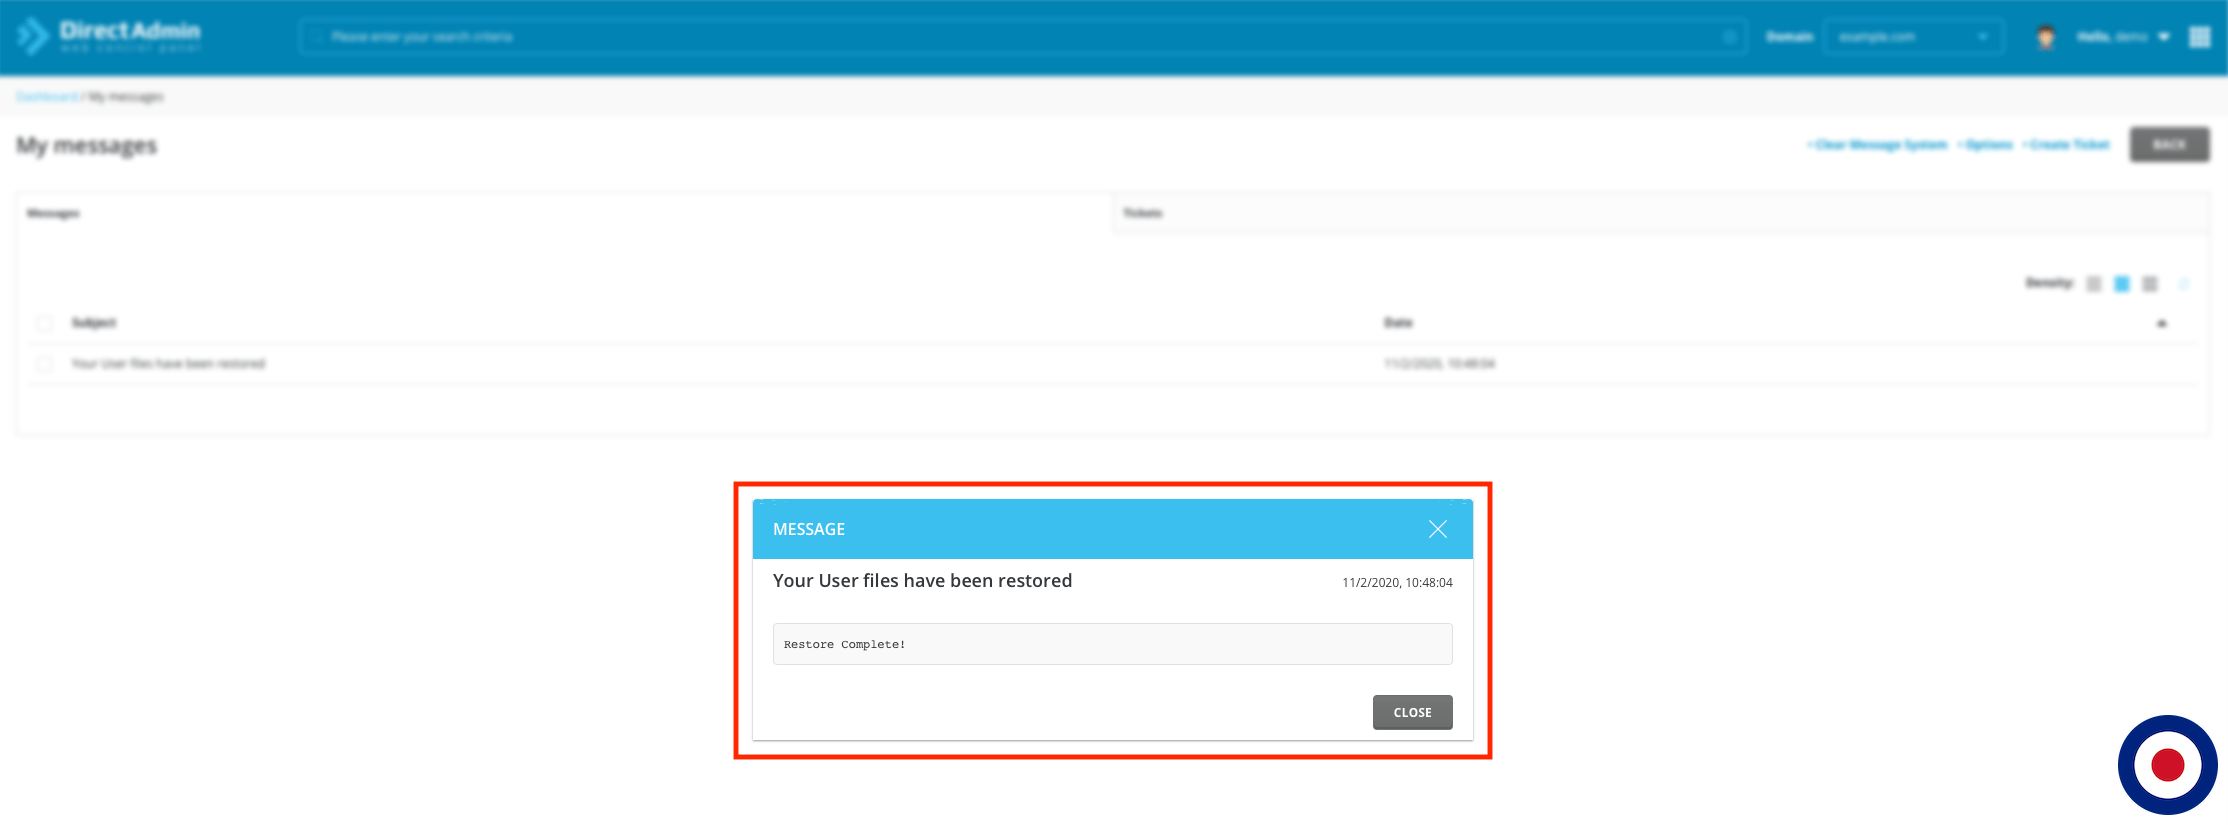
IF you click on the message title it will open and show the actual message. If any error have occurred during the restoration process they will be listed here, if there are no errors the message will simply read Restore Complete!. Once you have read the message you can click Close and delete the message if needed.
INSERT restore-backup-directadmin-complete.png
Your DirectAdmin account backup file has now been successfully restored using the Create/Restore Backups feature.
Important
Don’t forget to update your domain’s nameservers at your domain registrar. If you don’t update your nameservers your domain will not be pointed to your new web hosting provider. Your new web hosting providers name servers will look similar to these examples, ns1.newwebhost.com, ns2.newwebhost.com, ns3.newwebhost.com, ns4.newwebhost.com. If you are unsure how to change your nameservers, please contact your domain registrar.
That’s it. You have successfully backed up your existing DirectAdmin account website data, existing email accounts, data and settings, along with with your existing MySQL databases and successfully restored the account backup to your new DirectAdmin account.