Seafile is an open source file syncing and sharing platform which was built for high reliability, performance and productivity with privacy protection and teamwork features built in. Seafile offer two editions, Professional and Community and both editions offer desktop syncing and desktop drive clients for Windows, Mac OSX and Linux. There is also mobile clients compatible with both Apple IOS and Android. The Community Edition is free and the Professional Edition pricing is based on the number of users. If you have 3 or less users the Professional Edition is also free.
The Seafile platform offers reliable file syncing with files organised into different libraries which enables you to independently sync or share each library on any device. Being built with secure environments in mind, these libraries can also be encrypted with a user-chosen password to ensure its integrity and security. The files are encrypted before being synced to the server and not even the system admin can view the files or access the password.
Seafile keeps versions for files and snapshots for folders which allows users to perform a file or folder restoration to an earlier version very easily. The Snapshot for folders feature is a great way to protect files against ransomware infection. File versions are stored in an efficient way with reduced storage occupation by using de-duplication technology. Also, Seafile supports file locking which prevents concurrent editing of files and generating conflicting files. Users are able to lock files manually using the Web Dashboard or Desktop Clients. All files using Microsoft Office, OnlyOffice or Collabora are automatically locked as soon as they are opened.
In this guide, we will show you how to install Seafile file sync and share platform on CentOS 7 and CentOS 8. In addition, we will show you how to secure your Seafile installation by setting Nginx HTTP Security Headers and install a Let’s Encrypt SSL certificate with automatic renewal.
The easiest way to install Seafile on CentOS 7 or CentOS 8 is using the official auto-installer script. The script will install the latest version of Seafile alongside Ngnix HTTP server, MariaDB, Memcached and also setup Firewalld with Fail2ban.
Important
In order to install Seafile you will need to ensure your server has either CentOS 7 or CentOS 8 minimal installed with a minimum 2GB of RAM and you have root user access. The Seafile installer is designed to be run on a fresh installation only and should never be run on a production server, otherwise, you could lose valuable data!
If you want to use your domain name to access the Seafile Dashboard you will need to ensure you have set your FQDN in CentOS. You can set your FQDN in CentOS using the following commands.
[root@vpsbasics ~]# hostnamectl set-hostname hostname.domain.com
[root@vpsbasics ~]# hostname
hostname.domain.com
Install Seafile CE CentOS 7
Firstly, before installing Seafile you’ll need to ensure that your CentOS 7 system is up to date. You can check for any system or software updates and install them using the following commands.
yum check-update
yum update -y
Before we start we will need to ensure that the Seafile script will install the latest stable version of MariaDB (at time of writing v10.4). To change the version we will need to create a MariaDB repo file using your preferred editor. In our example we use the nano text editor.
nano /etc/yum.repos.d/MariaDB.repo
Once you have opened the file you will need to copy and paste the following MariaDB repository information before saving the file.
# MariaDB 10.4 CentOS repository list - created by VPSBasics.com
# http://downloads.mariadb.org/mariadb/repositories/
[mariadb]
name = MariaDB
baseurl = http://yum.mariadb.org/10.4/centos7-ppc64
gpgkey=https://yum.mariadb.org/RPM-GPG-KEY-MariaDB
gpgcheck=1
Now we can download and execute the Seafile installation script using the wget command and bash.
cd /root
wget --no-check-certificate https://raw.githubusercontent.com/haiwen/seafile-server-installer/master/seafile_centos
bash seafile_centos 7.0.5
After running the installation script, you’ll need to select option 1 to install Community Edition (CE). Once you have selected the CE edition you will need to wait for the installation to finish.
  This script installs the community edition of the Seafile Server on a Centos 7 64bit
  - Newest Seafile server version, MariaDB, Memcached, NGINX -
  -----------------------------------------------------------------

  This installer is meant to run on a freshly installed machine
  only. If you run it on a production server things can and
  probably will go terribly wrong and you will lose valuable
  data!

  For questions or suggestions please contact us at
  support@seafile.com

  -----------------------------------------------------------------

  Possible options:
  1 = Seafile Community (Free) Edition (CE)
  2 = Seafile Professional Edition (PRO)

1) CE
2) PRO
3) ABORT
Which Seafile version would you like to install? 1
Once the installation script has finished you can move onto the next section.
Install Seafile CE CentOS 8
Firstly, before installing Seafile you’ll need to ensure that your CentOS 8 system is up to date. You can check for any system or software updates and install them using the following commands.
yum check-update
yum update -y
Before we start we will need to ensure that the Seafile script will install the latest stable version of MariaDB (at time of writing v10.4). To change the version we will need to create a MariaDB repo file using your preferred editor. In our example we use the nano text editor.
nano /etc/yum.repos.d/MariaDB.repo
Once you have opened the file you will need to copy and paste the following MariaDB repository information before saving the file.
# MariaDB 10.4 CentOS repository list - created by VPSBasics.com
# http://downloads.mariadb.org/mariadb/repositories/
[mariadb]
name = MariaDB
baseurl = http://yum.mariadb.org/10.4/centos8-amd64
gpgkey=https://yum.mariadb.org/RPM-GPG-KEY-MariaDB
gpgcheck=1
Now we can download and execute the Seafile installation script using the wget command and bash.
cd /root
wget --no-check-certificate https://raw.githubusercontent.com/haiwen/seafile-server-installer/master/seafile-7.1_centos
bash seafile-7.1_centos 7.1.0
After running the installation script, you’ll need to select option 1 to install Community Edition (CE). Once you have selected the CE edition you will need to wait for the installation to finish.
  This script installs the community edition of the Seafile Server on a Centos 8 64bit
  - Newest Seafile server version, MariaDB, Memcached, NGINX -
   -----------------------------------------------------------------

  This installer is meant to run on a freshly installed machine
  only. If you run it on a production server things can and
  probably will go terribly wrong and you will lose valuable
  data!

  For questions or suggestions please contact us at
  support@seafile.com

  -----------------------------------------------------------------

  Possible options:
  1 = Seafile Community (Free) Edition (CE)
  2 = Seafile Professional Edition (PRO)

1) CE
2) PRO
3) ABORT
Which Seafile version would you like to install? 1
Once the installation script has finished you will see the following message that contains your server address with your admin username and password.
  Your Seafile server is installed
  -----------------------------------------------------------------

  Server Address:      http://IP_ADDRESS_OR_DOMAIN

  Seafile Admin:       SEAFILE_ADMIN_EMAIL
  Admin Password:      SEAFILE_ADMIN_PASSWORD

  Seafile Data Dir:    /opt/seafile/seafile-data

  Seafile DB Credentials:  Check /opt/seafile.my.cnf
  Root DB Credentials:     Check /root/.my.cnf

  Switch to Seafile system account with: su - seafile -s /bin/bash

  This report is also saved to /opt/seafile/aio_seafile-server.log

  Next you should manually complete the following steps
  -----------------------------------------------------------------

  1) Log in to Seafile and configure your server domain via the system
     admin area if applicable.

  2) If this server is behind a firewall, you need to ensure that
     tcp port 80 is open.

  3) Seahub tries to send emails via the local server. Install and
     configure Postfix for this to work or
     check https://manual.seafile.com/config/sending_email.html
     for instructions on how to use an existing email account via SMTP.

  Optional steps
  -----------------------------------------------------------------

  1) Check seahub_settings.py and customize it to fit your needs. Consult
     http://manual.seafile.com/config/seahub_settings_py.html for possible switches.

  2) Setup NGINX with official SSL certificate, we suggest you use Let’s Encrypt. Check
     https://manual.seafile.com/deploy/https_with_nginx.html

  3) Secure server with iptables based firewall. For instance: UFW or shorewall

  4) Harden system with port knocking, fail2ban, etc.

  5) Enable unattended installation of security updates. Check
     https://wiki.Ubuntu.org/UnattendedUpgrades for details.

  6) Implement a backup routine for your Seafile server.

  7) Update NGINX worker processes to reflect the number of CPU cores.
  Seafile support options

  -----------------------------------------------------------------

  For free community support visit:   https://bbs.seafile.com
  For paid commercial support visit:  https://seafile.com
That’s it. You have now successfully upgrade MariaDB to version 10.4 and installed Seafile on CentOS 7 or CentOS 8 using the official auto-installer script.
Secure Seafile CE
Now we will move onto make Seafile more secure by adding Nginx HTTP Security Headers and installing Let’s Encrypt SSL certificate with automatic renewal.
Add Nginx HTTP Security Headers
To add the Nginx HTTP Security Headers we will need to edit the seafile.conf file in the nginx folder using your preferred editor. In our example we use the nano text editor.
nano /etc/nginx/conf.d/seafile.conf
Once the seafile.conf has opened find the server block, which will start with your server_name and add the following headers below this.
server {
    server_name hostname.domain.com;

    add_header        X-XSS-Protection "1; mode=block" always;
    add_header        X-Content-Type-Options "nosniff" always;
    add_header        Strict-Transport-Security "max-age=31536000; includeSubDomains; preload;" always;
    add_header        X-Frame-Options "SAMEORIGIN" always;
    add_header        Referrer-Policy same-origin always;
    add_header        X-Permitted-Cross-Domain-Policies master-only;
Once complete, save your changes and reload Nginx with the following command.
nginx -s reload
That’s it. You have now successfully secured your Seafile installation by setting up Nginx HTTP Security Headers. Now we will setup SSL on Nginx using Let’s Encrypt SSL certificate and enable automatic renewal on CentOS 7 or CentOS 8.
Let’s Encrypt SSL CentOS 7
First you’ll need to enable the EPEL (Extra Packages for Enterprise Linux) repository using the following command.
yum -y install epel-release
You will need to enable yum-utils which is a collection of utilities and plugins that extend and supplement yum using the following command.
yum -y install yum-utils
Now you will install Certbot, configure it to request an SSL certificate and edit your Nginx configuration automatically to serve it, turning on HTTPS access in a single step – automagically, using the following command.
sudo yum install certbot python2-certbot-nginx
sudo certbot --nginx
The final step is to set up automatic renewals by adding a cron job to the default crontab using the following command.
echo "0 0,12 * * * root python -c 'import random; import time; time.sleep(random.random() * 3600)' && certbot renew -q" | sudo tee -a /etc/crontab > /dev/null
That’s it. You have now successfully upgrade MariaDB to v10.4 and installed Seafile on CentOS 7 using the official auto-installer script and secured your Seafile installation by setting Nginx HTTP Security Headers and installing Let’s Encrypt SSL certificate with automatic renewal. Now all that is left is to access the Seafile web dashboard and enjoy your new file syncing and sharing platform.
Let’s Encrypt SSL CentOS 8
First you’ll need to install Certbot using the following commands.
wget https://dl.eff.org/certbot-auto
sudo mv certbot-auto /usr/local/bin/certbot-auto
sudo chown root /usr/local/bin/certbot-auto
sudo chmod 0755 /usr/local/bin/certbot-auto
Now you will need to request an SSL certificate and edit your Nginx configuration automatically to serve the SSL certificate, turning on HTTPS access in a single step – automagically, using the following command.
sudo /usr/local/bin/certbot-auto --nginx
The final step is to set up automatic renewals by adding a cron job to the default crontab using the following command.
echo "0 0,12 * * * root python3 -c 'import random; import time; time.sleep(random.random() * 3600)' && /usr/local/bin/certbot-auto renew -q" | sudo tee -a /etc/crontab > /dev/null
That’s it. You have now successfully upgrade MariaDB to v10.4 and installed Seafile on CentOS 8 using the official auto-installer script and secured your Seafile installation by setting Nginx HTTP Security Headers and installing Let’s Encrypt SSL certificate with automatic renewal. Now all that is left is to access the Seafile web dashboard and enjoy your new file syncing and sharing platform.
Seafile CE Dashboard
To access the Seafile web dashboard, open your web browser and type in your server IP address or FQDN. You will now see the Log In page as shown in the screenshot below, simply enter the Seafile Admin and Admin Password.

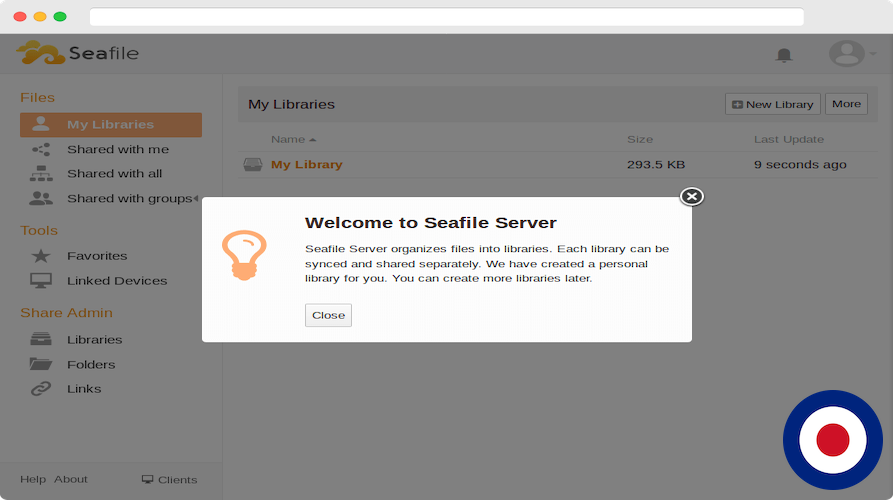
After logging into the Seafile web dashboard, you will encounter the dialog box as showed in the screenshot below. Click Close to go to the My Libraries page.
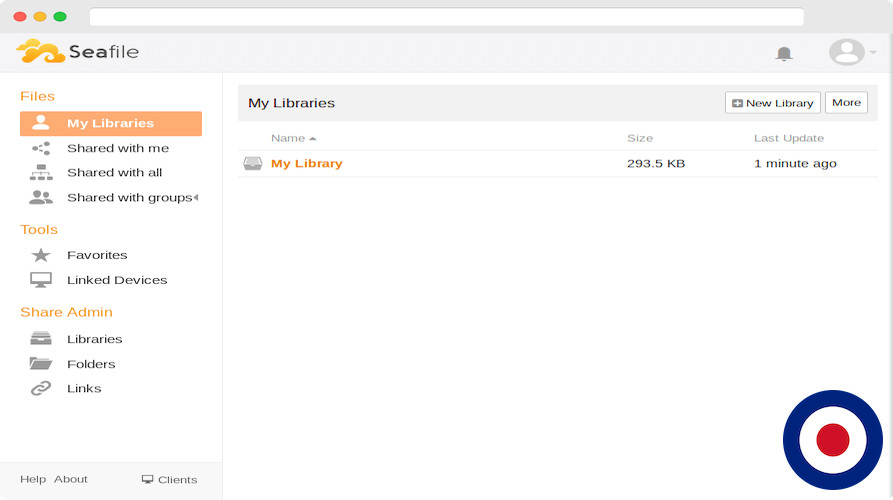
In the My Libraries interface, you can create a new library, access a previously created library, upload your files or share them with all users or a specific group.